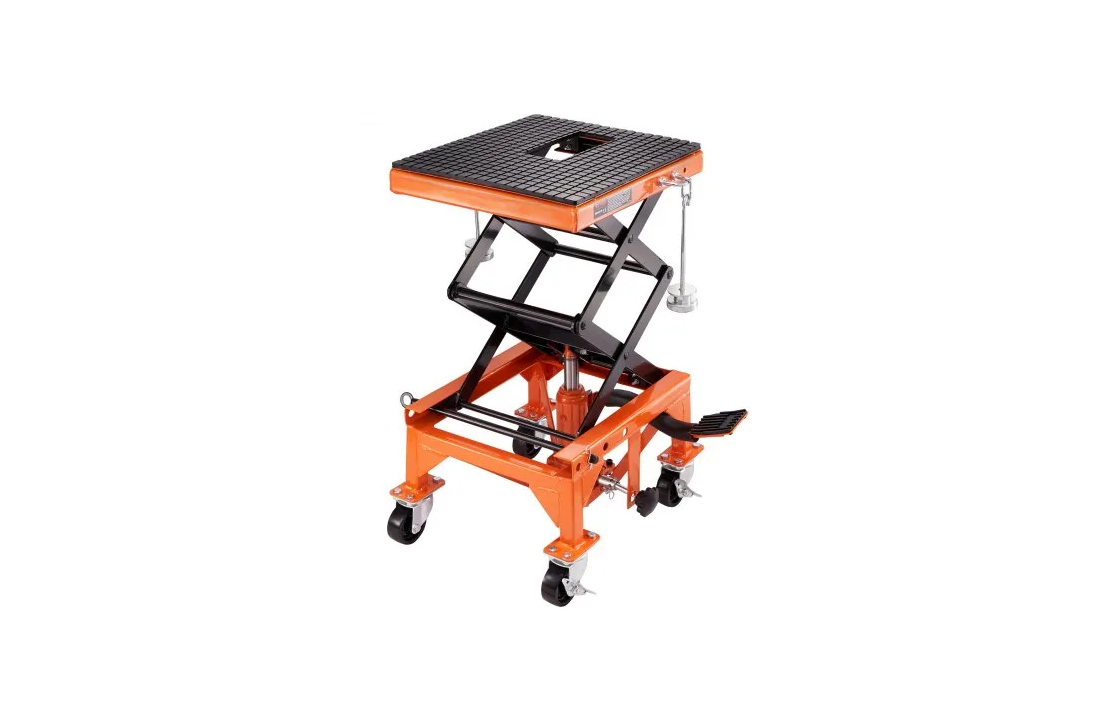
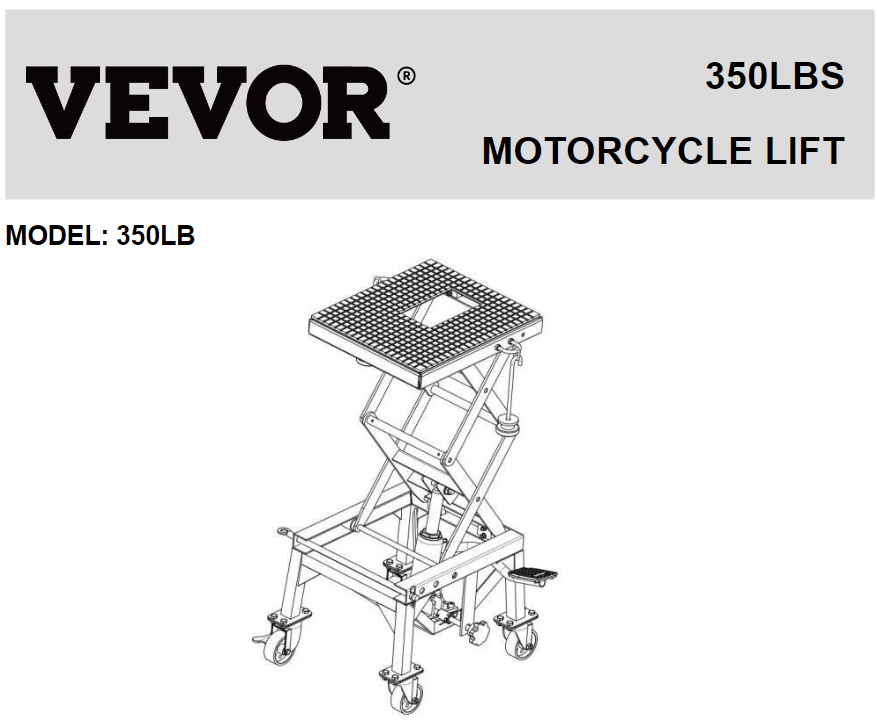
VEVOR 350LB Motorcycle Lift Instruction Manual

We continue to be committed to provide you tools with competitive price. “Save Half”, “Half Price” or any other similar expressions used by us only represents an estimate of savings you might benefit from buying certain tools with us compared to the major top brands and does not necessarily mean to cover all categories of tools offered by us. You are kindly reminded to verify carefully when you are placing an order with us if you are actually saving half in comparison with the top major brands.
NEED HELP? CONTACT US!
Have product questions? Need technical support? Please feel free to contact us:
Technical Support and E-Warranty Certificate www.vevor.com/support
This is the original instruction, please read all manual instructions carefully before operating. VEVOR reserves a clear interpretation of our user manual. The appearance of the product shall be subject to the product you received. Please forgive us that we won’t inform you again if there are any technology or software updates on our product.
Main Specifications

Caution
- The maximum load is 350LBS.DO NOT exceed this rated capacity.
- Use this lift for lifting purpose only. DO NOT use it for any other purpose it is not designed to perform.
- Keep children and unauthorized persons away from the work area.
- Only use this lift on a surface that is stable, level, dry and not slippery, and capable of sustaining the load .Keep the surface clean, tidy and free from unrelated materials and ensure that there is adequate lighting.
- Before lifting ensure the motorcycle is adequately secured to the lifting platform with thread knobs, big washers, J-hooks and U-bolts.
- When the platform has been used to the working height, ensure the locking bar is engaged to prevent accidental lowering.
- Always keep your hands and feet away from moving parts.
- When work is done, check under lift and motorcycle to ensure that there are no obstructions and that it is safe to lower the unit. remove the locking bar and then SLOWLY turn the release valve to GENTLY lower the lift.
- DO NOT allow untrained persons to operate the lift.
- DO NOT make any modifications to this motorcycle lift.
- DO NOT expose the lift to rain or snow.
- Ensure that you read, understand and apply the safety instructions and warnings before use. Failure to heed these instructions may result in property damage and/or personal injury.
MAINTENANCE
- When not in use, the lift must be stored in the lowest position in a dry location to minimize ram and piston corrosion.
- Keep the lift clean and wipe off any oil or grease . Lubricate all moving parts.
- Periodically check the ram and piston for sings of corrosion. Clean exposed areas with a clean oiled cloth.
- Before each use check all parts. If any part of the lift is damaged or suspect, remove the lift from service and take necessary action to repair.
- When lift efficiency drops, open the release valve and pump the lift foot pedal rapidly 15 to 20 times to purge away air from the hydraulic system.
Main Construction
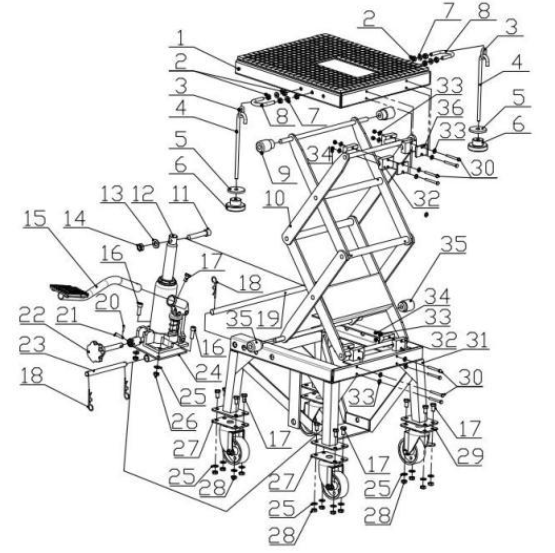
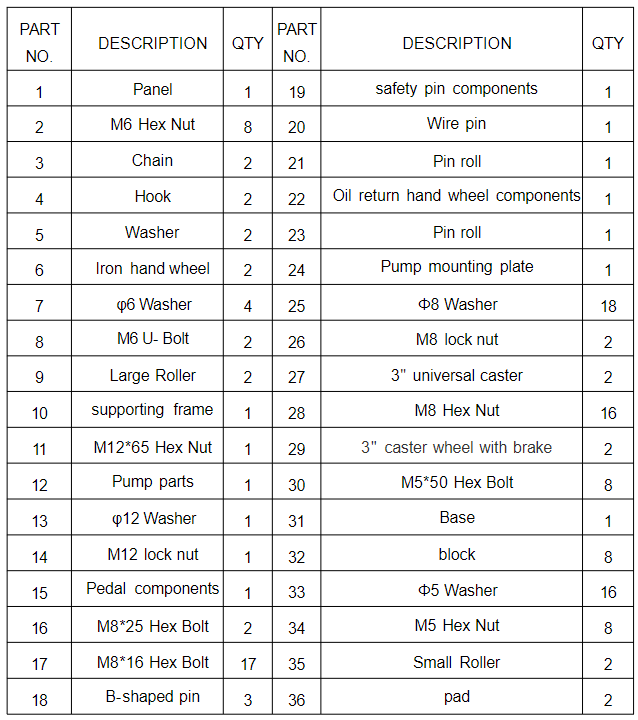
Assembly
STEP 1:
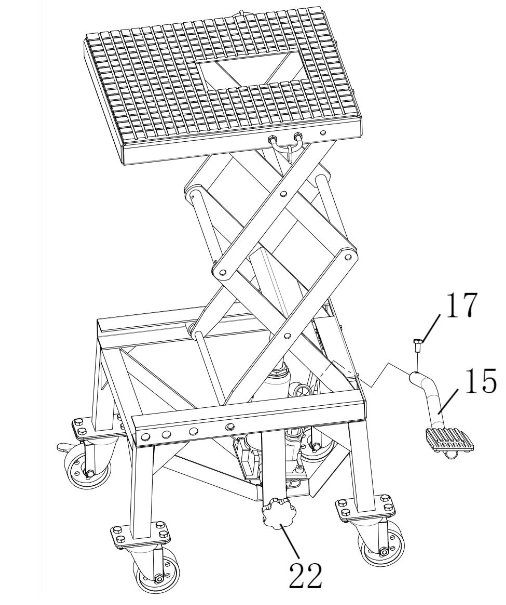
Loosen the Oil return hand wheel components (22)(note: Do not unscrew it), put the frame to the lowest level, press the oil pump hatchback with your hand, install the pedal components(15) into the oil pump hatchback hole, and install the M8*16 outer hexagon bolt(17).
STEP 2:
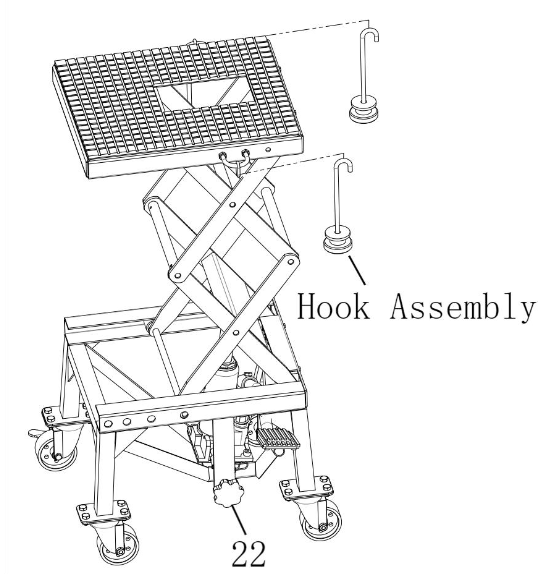
Loosen the Oil return hand wheel components (22)(note: Do not unscrew it).Press the foot assembly quickly with the hand, the faster the speed, the better the effect, press for 30 seconds; Then, tighten the oil return hand wheel assembly, raise the frame, and install two hook assemblies.
STEP 3:
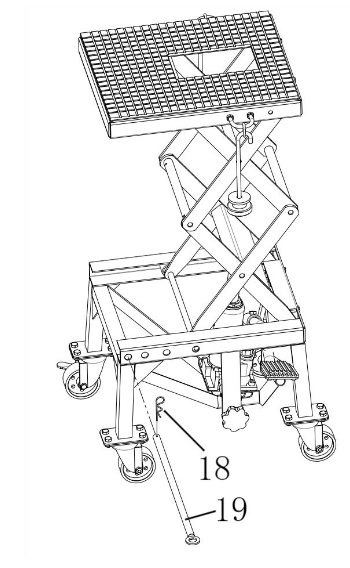
Rack to the required height, insert the safety pin components(19) into the corresponding safety pin holes, and install the B-shaped pin(18).
Matters Needing Attention
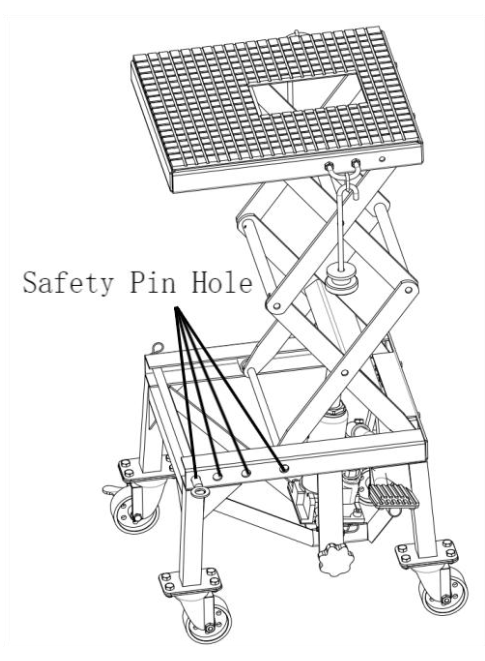
The function of the safety pin is to prevent the sudden failure of the hydraulic jack, causing the frame to fall, causing an accident, so in the process of using the lifting device, to the corresponding height, the safety pin must be used according to the above requirements.
Address:Baoshanqu Shuangchenglu 803long 11hao 1602A-1609shi Shanghai
Imported to AUS: SIHAO PTY LTD, 1 ROKEVA STREETEASTWOOD NSW 2122 Australia
Imported to USA: Sanven Technology Ltd., Suite 250, 9166 Anaheim Place, Rancho Cucamonga, CA 91730

Pooledas Group Ltd Unit 5 Albert Edward House, The Pavilions Preston, United Kingdom

SHUNSHUN GmbH Römeräcker 9 Z2021, 76351 Linkenheim-Hochstetten, Germany
Made In China

Technical Support and E-Warranty Certificate www.vevor.com/support