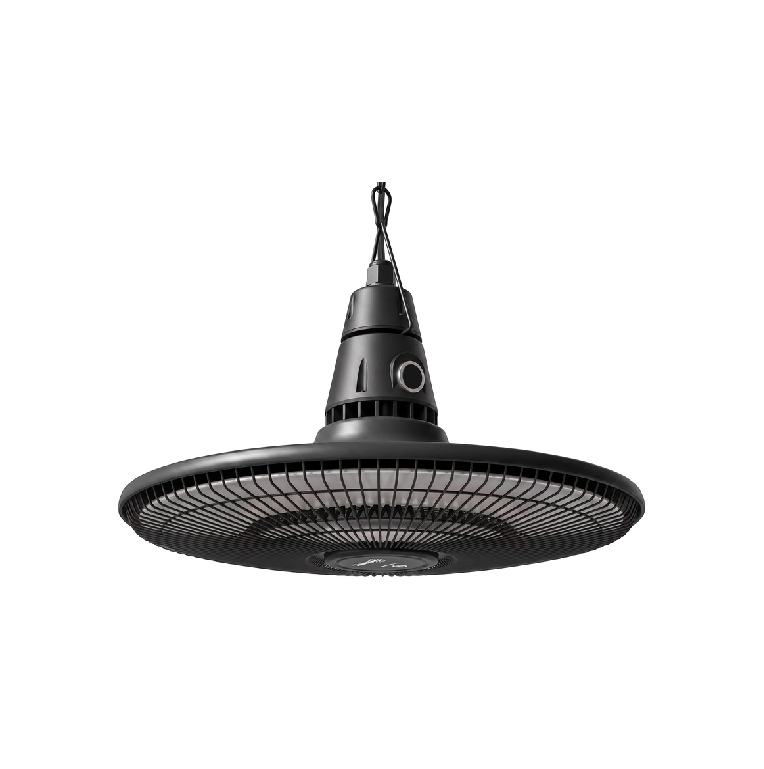
Outsunny 842-503V80 Outdoor Heater Instructions
SAFETY WARNING
READ ALL INSTRUCTIONS BEFORE ATTEMPTING TO OPERATE THIS UNIT. KEEP THE ASSEMBLY INSTRUCTIONS FOR FUTURE REFERENCE. KEEP THE ORIGINAL PACKAGING FOR USE WHEN STORING THE HEATER DURING EXTENDED PERIODS OF NON-USE.
- Read all instructions before using this unit.
- Do not leave this unit unattended when in use.
- This heater will get hot when in use. Do not touch hot surfaces.
- Caution: Some parts of this product can become very hot and cause burns. Particular attention must be paid when children and vulnerable people are present.
- Do not move the unit when in use. Wait until the heater is completely cool before moving and check that it has been unplugged from the power supply.
- Position the unit at least 1 m away from highly combustible materials such as furniture, trees, leaves, dry grass, and bushes.
- Do not position the heater with the heating element pointing upwards towards a ceiling. The heating element must face the area intended to be heated.
- Warning: In order to avoid overheating, do not cover the heater. It is not for drying clothes.
- Keep children and pets at a safe distance from the unit.
- This appliance can be used by children aged 8 years and above and persons with reduced physical, sensory, or mental capabilities or lack of experience and knowledge, if they have been given supervision or instruction concerning the use of the appliance in a safe way and understand the hazards involved.
- Children shall not play with the appliance. Cleaning and user maintenance shall not be carried out by children without supervision.
- Do not operate the heater if there are any signs of damage or malfunction.
- Do not attempt to repair or adjust any electrical or mechanical functions on this unit. The unit does not contain any user-serviceable parts. Only a qualified electrician should perform servicing or repairs. Attempting to repair the unit yourself will void your warranty.
- If the power cable is damaged, it must be replaced by the manufacturer, its service agent, or similarly qualified persons in order to avoid a hazard.
- Do not handle the element with bare hands. If it is inadvertently touched, remove finger marks with a soft cloth and methylated spirits or alcohol; otherwise, the marks will burn into the element, causing premature heater failure.
- Do not replace or attempt to replace the element in this product.
- This product is suitable for indoor and outdoor use. However, do not use this heater near bathrooms, showers, or swimming pools.
- This product must not be left exposed to the elements for long periods of time.
- Do not touch the plug with wet or damp hands.
- Do not run the power cable under carpeting. Do not cover the power cable with rugs, runners, or similar coverings. Arrange the power cable away from foot traffic and where it will not be tripped over.
- Do not wind the power cable around the unit.
- Do not insert or allow foreign objects to enter any ventilation or opening on the heater, as this may result in electric shock, fire, or damage to the heater.
- To prevent a possible fire, do not block the air vents.
- A heater has hot and arcing or sparking parts inside. Do not use in areas where petrol, paint, explosives, and/or flammable liquids are used or stored. Keep the unit away from heated surfaces and open flames.
- Where possible, avoid the use of an extension cable as this may overheat and cause a fire. However, if you have to use an extension cable, ensure it is suitable for the purpose, rated for outdoor use, and preferably has an RCD device fitted or attached.
- Always ensure the heater is plugged into a suitable socket rated for outdoor use.
- To disconnect the heater, turn controls to OFF, then remove the plug from the socket. Do not unplug by pulling on the power cable.
- Always unplug the unit and ensure it is completely cold before moving, cleaning, or storing.
- This heater is intended for domestic use only and should not be used for commercial or contract purposes. Any alternative use not recommended by the manufacturer may result in fire, electric shock, or injury to persons.
- The use of attachments on the heater is not recommended.
- Warning: This heater is not equipped with a device to control the room temperature. Do not use this heater in small rooms when occupied by persons not capable of leaving the room on their own, unless constant supervision is provided.
- Check exterior walls for areas of damage before installing the heater.
- Always use on a dry, suitably strong, stable, flat, and level surface.
- Check exterior walls for communication and electrical cables and pipelines. Should any service lines be present in the immediate vicinity, do not install your heater; find an alternative location to install this product.
- Do not position directly above or below an electrical socket.
- Do not remove any of the warning stickers or signs from the product.
ASSEMBLY INSTRUCTIONS

- COMPONENTS & UNPACKING
Empty the packing box completely and verify that all parts are present and missing none.
DO NOT plug the unit into a power source until it is fully assembled.
Inspect the unit and the power cord to ensure there is NO damage TO either. - ASSEMBLY & INSTALLATION SAFETY
Before hanging the heater (e.g., on a gazebo, under a balcony, or a roof), ensure that it is switched off and disconnected from power.
Important: Always allow the heating element to cool down completely before moving or installing the heater. - Ensure the installation position of the product:
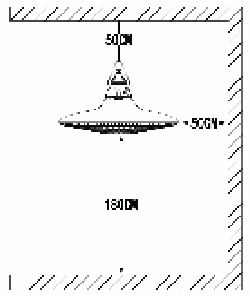
The installation position of the product should be placed 1.8m from the ground, with a minimum distance of 0.5 m from the bottom of the ceiling, roof or other covering and a minimum distance of 0.5 m from the walls on both sides.
- Installation Instructions
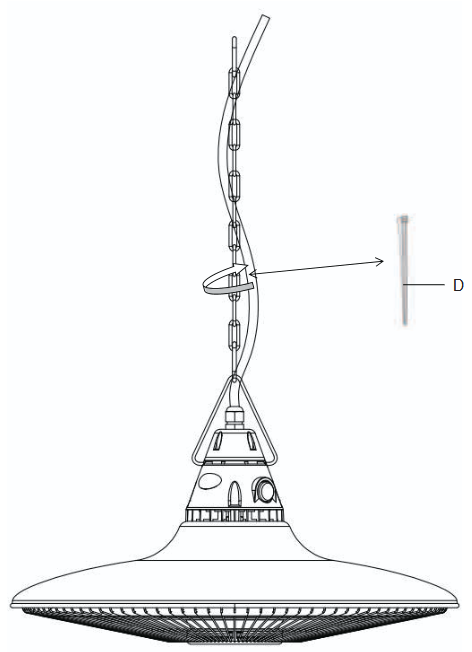
1. The mounting hook is first secured to the wall or ceiling. Then, the main unit is hung onto the hook.
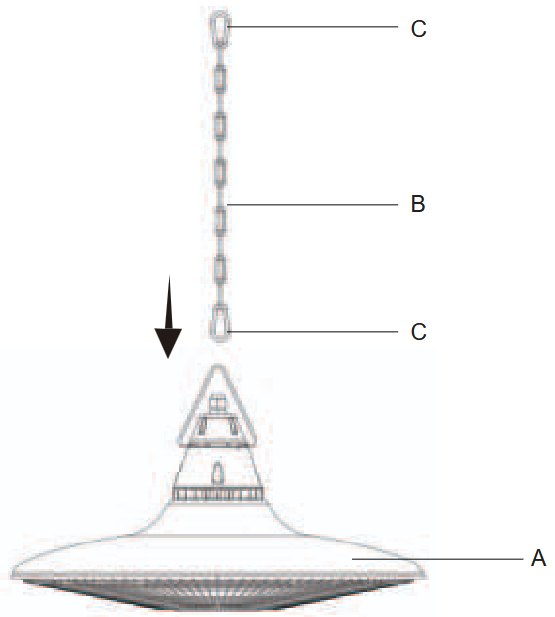
2. Secure the power cord with plastic cable ties.
OPERATING INSTRUCTIONS
Remote Control Pairing
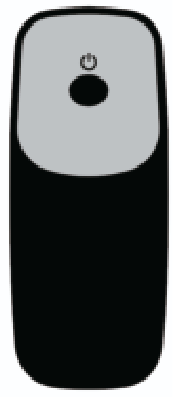
- Enter Pairing Mode: Turn on the main power switch. The red light will start flashing. You have 20 seconds to pair.
- Pair: Press and hold the Power Button on the remote for 5 seconds until the red light stays solid. This indicates the pairing is successful.
- Timeout: If the 20 seconds expire before pairing, please turn the main power off and on again to reset.
- Memory: The pairing settings are saved and will not be lost during a power outage.
- Replacement: If you need to change the remote control, please repeat the steps above.
MAINTENANCE AND CLEANING
Maintenance
Attention! Careful and regular maintenance of the Infrared Heater is required to ensure long and efficient operation of your appliance.
- Check the cleanliness of the reflector and IR filament at least once a month. If necessary, follow the cleaning instructions below.
- The frequency of checks should be increased depending on the level of dust in the environment.
- Visually inspect the reflector, wires, and frame for deformation while cleaning. In case of any deformation, consult a qualified technician.
- Visually inspect the power cable and plug while cleaning. If any damage or deformation is found, consult a qualified technician.
- It is recommended to replace the reflector every 2 years for more efficient operation.
Cleaning
Attention! Regular and careful cleaning helps your heater operate efficiently for many years.
- Unplug the power cable before cleaning the appliance to ensure your safety.
- Remove the front safety grill by unscrewing the fasteners on the frame using a slotted screwdriver.
- Clean the reflector and filament with a soft cloth, a soft brush, or compressed air. The cloth may be slightly damp, but never wet, and do not use any chemical cleaners.
- Do not use abrasive cleaning materials (such as scouring powders) that are likely to damage the reflector.
- Reinstall the front grill and secure it with the slotted screwdriver.