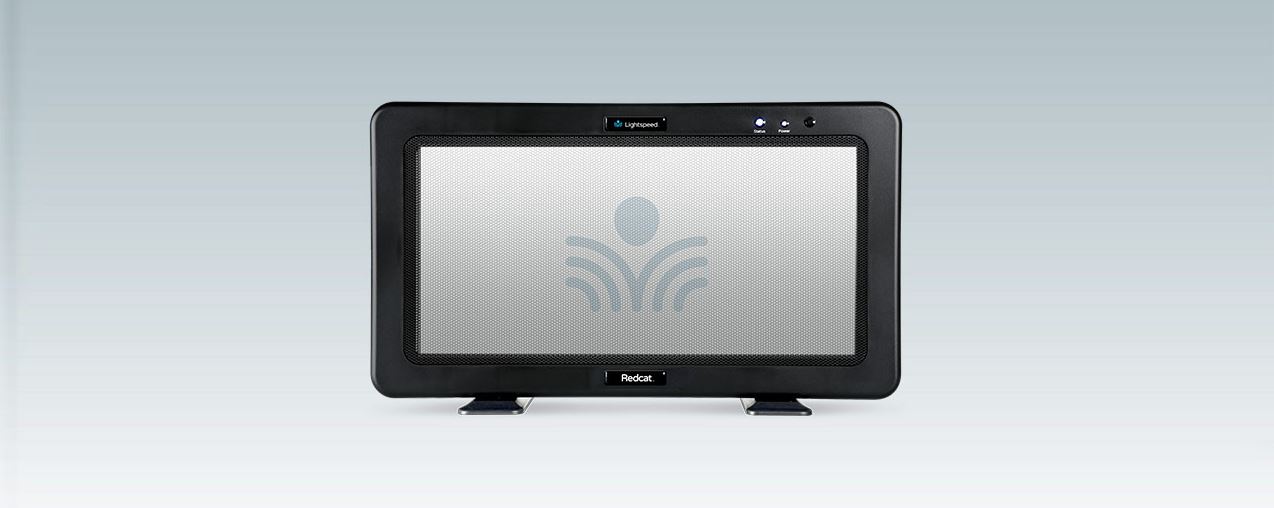
Lightspeed Redcat Access Instructional
Audio System User Guide

DETERMINE SET-UP LOCATION AND PLUG IN POWER SUPPLY
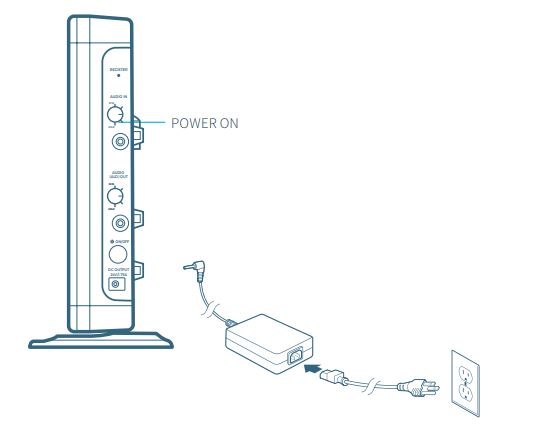
- Redcat Access should be placed within 7 feet of an electrical outlet and on a surface about 4-6 feet off the ground.
- Next, find a location as far away as possible from the teacher who will be using the microphone. Avoid putting Redcat in close proximity to the teacher’s mic which can result in feedback.
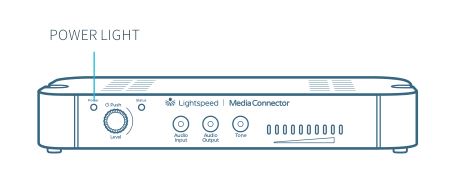
- Connect the AC power cord into the DC power supply. Insert the connector into the Redcat and plug the power cord into an electrical outlet. Redcat Access automatically powers on and the white POWER light on the front panel will glow.
USING THE FLEXMIKE

Remove microphone from charger. Press the mute button to unmute, hold near your mouth and begin speaking.
USING THE SHAREMIKE
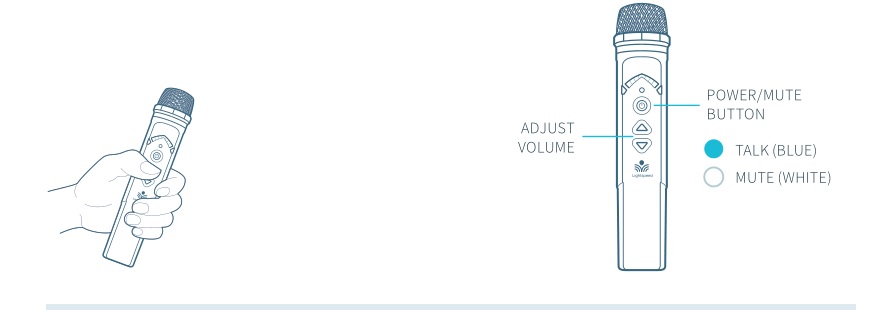
Remove microphone from charger and press the mute button to begin speaking.
CHARGE MICROPHONES NIGHTLY
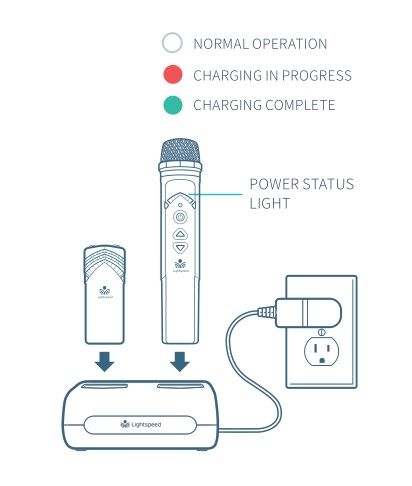
Place the microphones into the cradle charger. The power status light will glow red when it is charging.
When charging is complete, the power status light will glow green.
It takes about 5-6 hours to fully charge the microphone battery.
PAIRING MICROPHONES TO REDCAT ACCESS
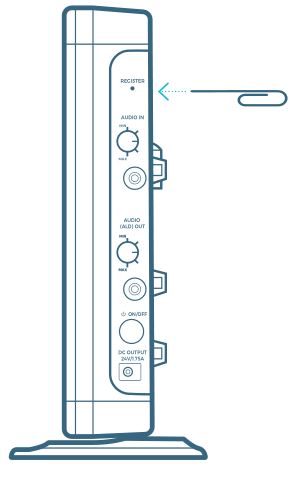
- With a paperclip, push the register button on the side of Redcat Access.
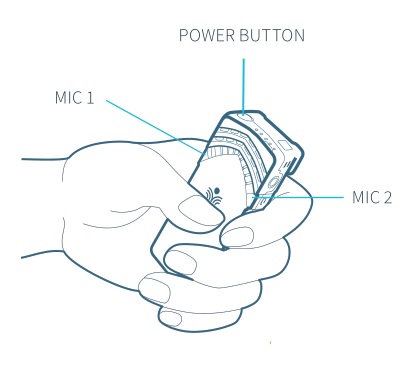
- From a powered off state, press and hold the power button for 5 seconds until the mic 1 and mic 2 lights start flashing, then release the button and let the pairing process finish.
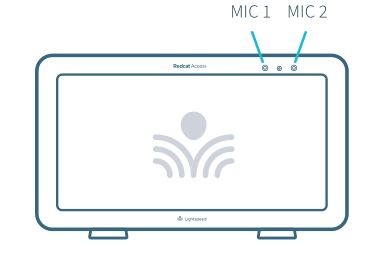
- The mic 1 or mic 2 lights on Redcat Access will light green indicating the pairing process is complete. The corresponding mic 1 or mic 2 light on the microphone will stay illuminated.
![]() Your system is shipped with microphones and base units already paired.
Your system is shipped with microphones and base units already paired.
If you ever need to pair new components, follow this pairing process.
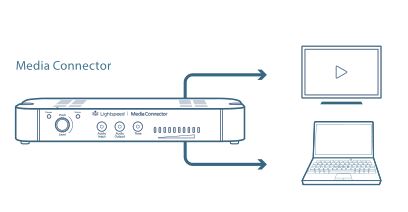
Redcat Access with optional Media Connector
- DETERMINE LOCATION
Media Connector is designed to be connected to the primary media source in the classroom, usually the computer or display panel.
- CONNECT TO POWER
Connect the USB cable power cord to a computer, or use the USB power adapter to plug into wall outlet. Plug the USB cable into the USB input on the back of the Media Connector.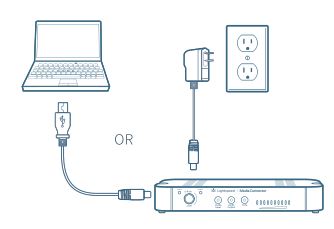
- POWER ON
When powered on, the white LED on the front panel will glow.
Redcat does not need to be powered off at the end of day, but if desired, you may power down Redcat by powering down the Media Connector.
CONNECTING TO AN ANALOG AUDIO SOURCE
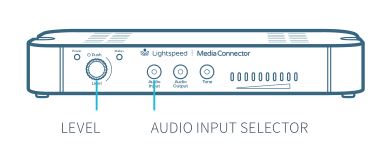
Plug your external audio equipment (computer, tablet, video display, etc.) into one of the Audio input jacks using a 3.5mm audio cable.

Adjust the volume by pressing the Audio Input selector and adjusting the level knob.
USING FLEXMIKE AS A WIRELESS AUDIO LINK
You can connect a 2nd microphone to your computer’s USB port to enable a wireless 2-way audio link.
SEND AUDIO FROM THE COMPUTER to the Redcat to ensure all audio from the computer (videos, video conferencing, audiobooks, music, etc) can be played through Redcat Access.
SEND AUDIO TO THE COMPUTER from the Redcat Access to ensure the teacher’s Flexmike and any student microphones are clearly picked up by a video conferencing solution.
Connect the microphone to your computer using a USB-C cable. Open your computer sound settings to select Lightspeed Audio as the microphone and speaker.
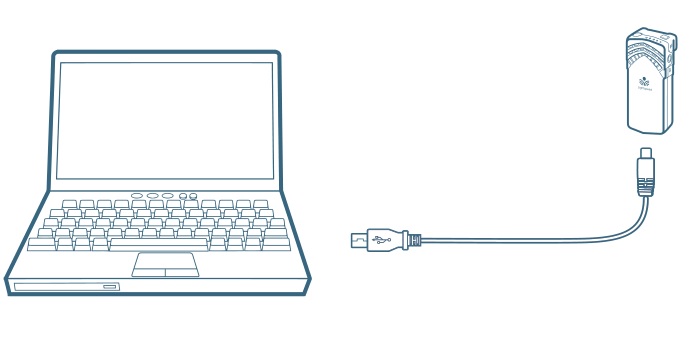
USB cable sold separately. Lightspeed offers a USB-A to USB-C cable for sale (part #USBC)
For complete operating instructions, go to www.lightspeed-tek.com/RCAN-usermanual (or scan the 2D barcode).
![]()
QS0618US01-1
