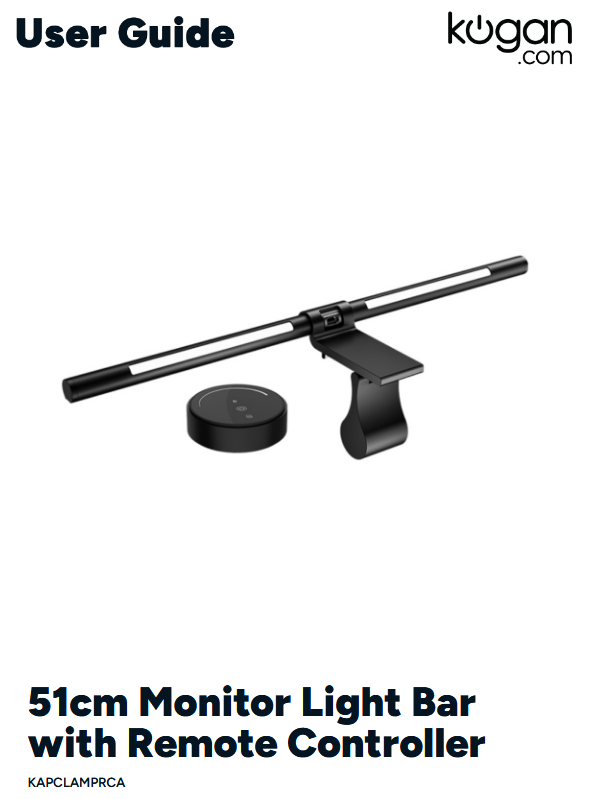
kogan KAPCLAMPRCA 51cm Monitor Light Bar with Remote Controller User Guide
Safety & Warnings
- Read all safety notes and instructions before first use even if you are familiar with this product. Retain this user guide for future reference.
- Use the product only as described in this user guide.
- If the lamp flickers after turning on, try another USB port on the computer or replace the power adaptor.
- It is recommended to use USB port on the rear panel of the computer to supply power to this product.
- Use a power adaptor rated 5V/1.5A or above to supply power.
- Use the provided USB cable, do not use a USB extension cable or splitter, otherwise the hanging lamp may not operate correctly.
- Ensure the light bar is securely attached to the monitor to avoid damage or potential injury.
- The LED module is not replaceable. Do not attempt to repair. Contact help.Kogan.com for support.
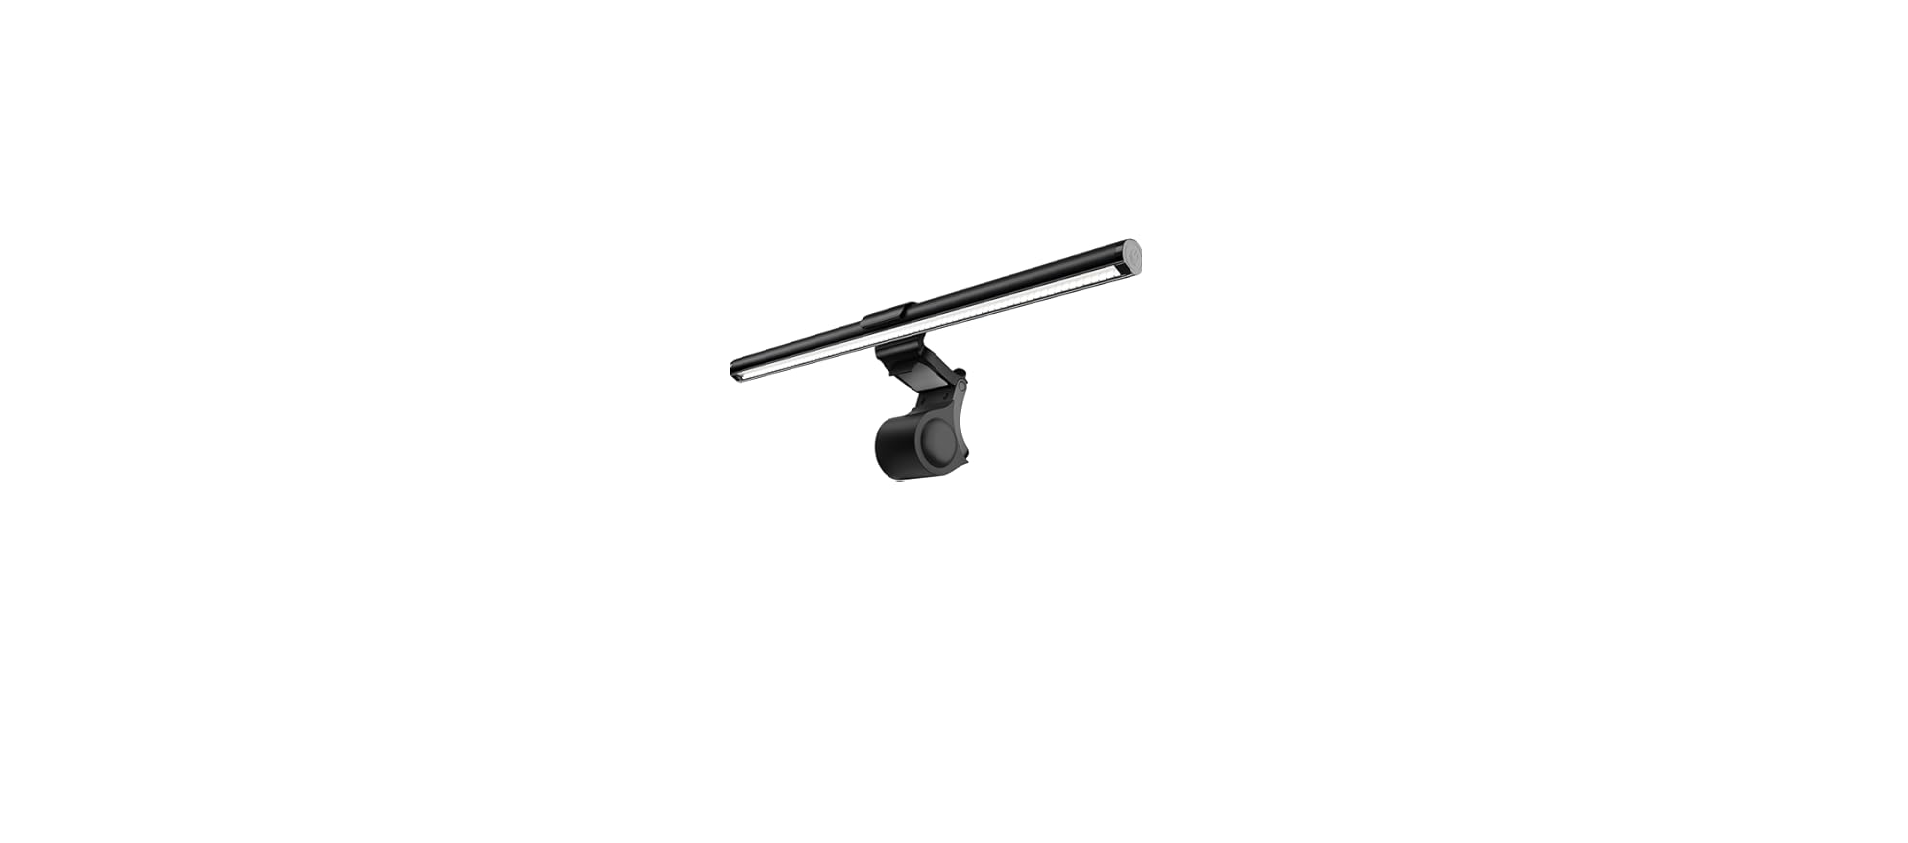
Overview
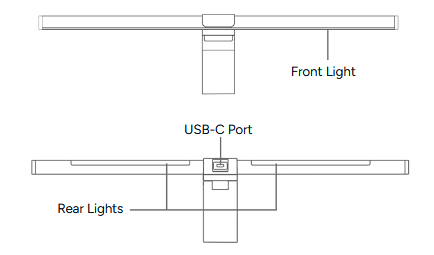
Side
Remote Control
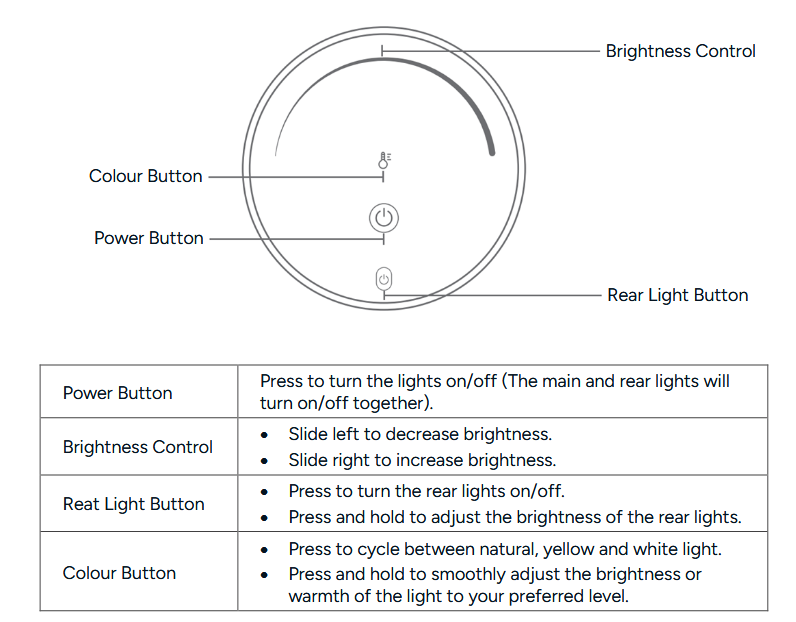
The lightbar automatically recalls the last colour temperature and brightness settings used
when the product is turned on again.
Installation
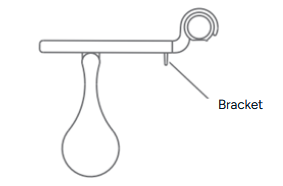
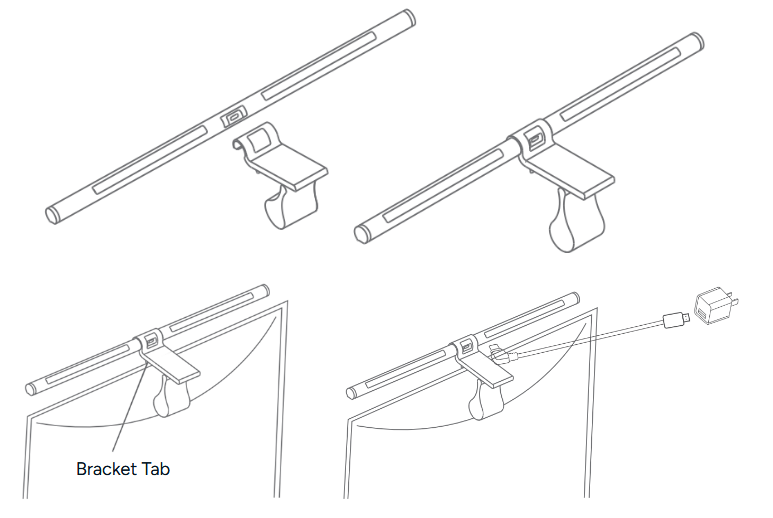
- Attach the bracket and align the power port on the lamp head with the notch at the end of the bracket clip, then gently snap it into place.
- Hang the lamp in the centre at the top of the screen. Ensure the bracket tab is positioned on the front side of the screen.
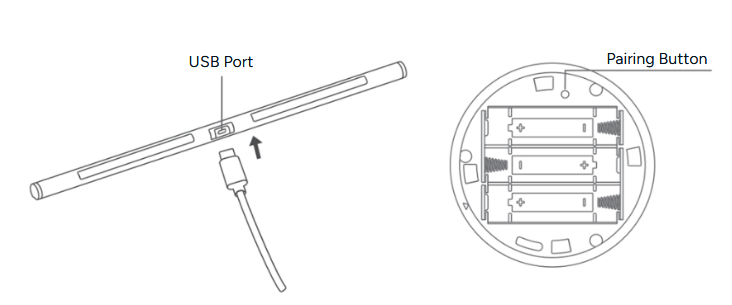
- Connect the USB-C cable to the power port on the lamp head, then plug the other end into a vacant USB port or a power adaptor rated 5V 1.5A or higher.
- Hold the bracket with one hand to prevent it from falling, then adjust the angle of the lamp head with the other hand to complete the installation.
Installing Batteries in the Remote Control
- Press the battery cover at the bottom of the remote with your palm and rotate it clockwise until the unlock icon aligns with the inverted triangle icon. The cover is now unlocked.
- Turn the battery cover over to remove it.
- Insert x3 AA batteries, ensuring the positive and negative ends are correctly aligned.
- Close the battery cover, rotate it counterclockwise until the lock icon aligns with the inverted triangle icon, then use the remote control as normal.
Operation
Pairing/Unpairing the Remote Control
- Pairing: Unplug and reconnect the USB cord, then press and hold the remote pairing button. Do not release the button until the main light flashes twice, indicating successful pairing. The main and rear lights will then turn on with warm light.
- Unpairing: Unplug and reconnect the USB cord, then press and hold the remote pairing button for 5 seconds. Do not release the button until the main light flashes six times, indicating successful unpairing. After unpairing, the main light will turn yellow.
- Please ensure pairing or unpairing is completed within 8 seconds of reconnecting the power. If more than 8 seconds pass, the process will fail. If pairing is unsuccessful, unpair first and then try pairing again.
Notes:
- Ensure pairing or unpairing is completed within 8 seconds of reconnecting the power. If more than 8 seconds pass, the process will fail. If pairing is unsuccessful, unpair first and then try pairing again.
- The remote control is already paired at the factory and can be used straight away.
Adjusting the Bracket
- When using a thinner monitor, slide the bracket area ‘A’ forward.
- For a thicker monitor, slide the bracket area ‘A’ backward. Ensure the bracket sits firmly against the back of the monitor.
- For a curved display, slide the area ‘B’ to extend the lamp tube beyond the curved edge of the screen.
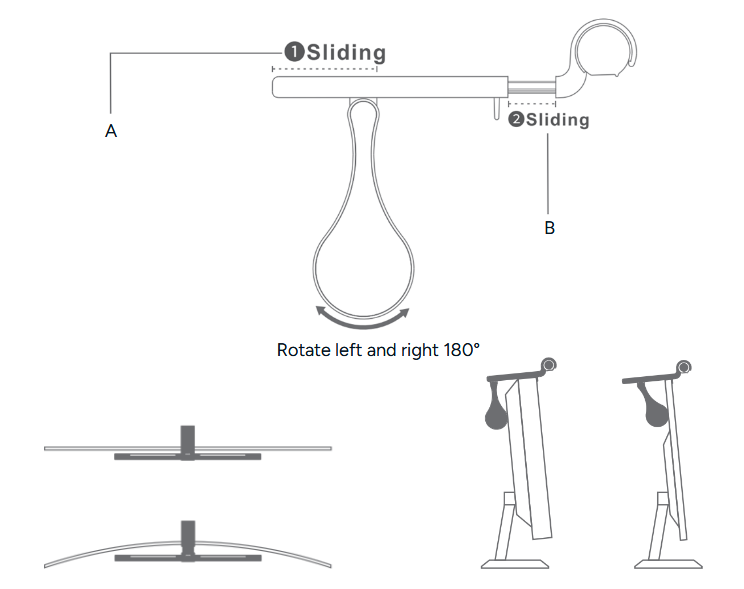
- Ensure the bracket tab firmly pressed against the monitor.
- If the lamp leans forward, slide part ‘A’ backward and retract part ‘B’ slightly until the lamp is stable.
- If the lamp tilts backward, slide part ‘A’ forward and extend part ‘B’ slightly until the lamp is stable.
- For curved screens, extend part ‘B’ to a suitable distance, then adjust the front and rear positions and the angle of part ‘A’ according to the screen thickness until the lamp is steady.
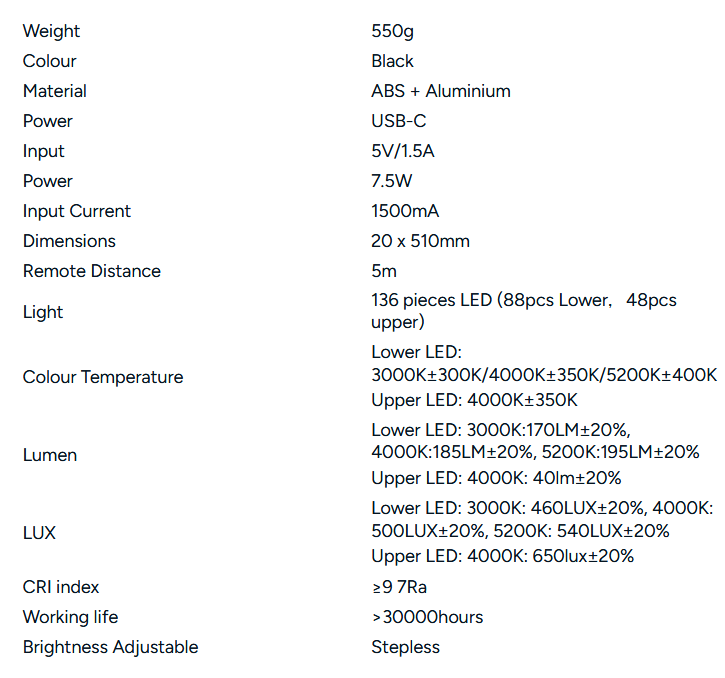
Specifications
Need more information?
We hope that this user guide has given you the assistance needed for a simple set-up.
For the most up-to-date guide for your product, as well as any additional assistance you may require, head online to help.Kogan.com.
![]()