Installation Guide of GOLDEN LIGHTING 3718-5 Quincy 5-Light

Cordoban Bronze Clear Glass Chandelier
![]()
Thank You for Choosing Golden Lighting for Your Lighting Needs!

Pendants & Linear Pendants Above a Kitchen Island Center a linear pendant over the island. If hanging pendants, use one pendant for every 24″ of island. Fixtures should hang at least 30″ above the countertop.
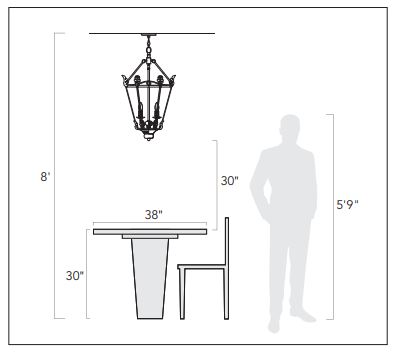
Pendants & Chandeliers Above a Dining Room Table Fixtures should stay at least 30″ above the table. Use a fixture that is 12″ narrower than the width of the table.
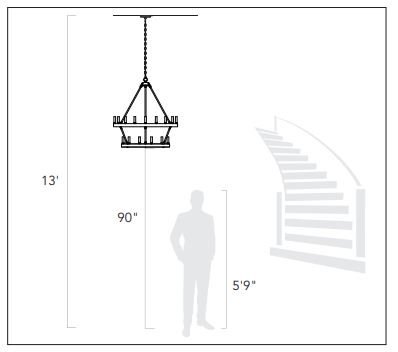
Pendants and Chandeliers in Open Areas
The bottom should hang at least 7.5 feet from the floor. Allow clearance for any opening doors.
We appreciate your business and hope you love your new light!
Great lighting can add value and enhance the look of your home. To ensure the best lighting in your space, remember to layer your lighting. This ensures that your space will have both task and ambient lighting. Coordinating fixtures like sconces, flush mounts, and pendants can help you meet your layered lighting needs and reinforce your desired aesthetic. Install the lights with dimmers that allow you to control the level of light output at any given moment.
Get function and style! Browse our site for coordinating lights and expert lighting advice. To help create the perfect look, visit www.GoldenLighting.com.
Love your light and want to show it off?
Follow us, share a picture, and tag us on Social…
Assembly Instructions: 3718-5
How to Identify the Fixture’s Wires
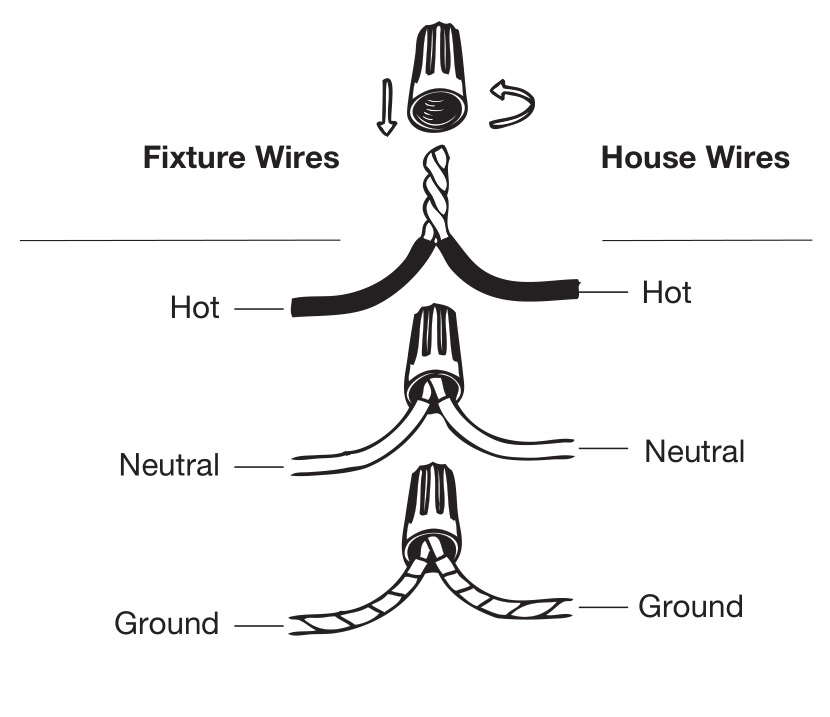
Hot: Smooth, Black, or Transparent with Black Inner Thread
Neutral: Ribbed, White or Transparent with White Inner Thread
Ground: Copper, Bare Metal, Green, or Transparent Inner Thread
![]()

Get help, quick tips, and explore curated content
For Customer Service, contact the place of purchase to arrange for replacement parts.
IMPORTANT:
- All installation work should be done by accredited professional.
- Shut off power supply at fuse or circuit breaker!
- Use only the specified bulbs. Do not exceed the maximum wattage!
Assembly Instructions:
PREPARING FOR INSTALLATION
Carefully remove the new fixture from the carton as well as the yellow bag that holds all of the parts. See the important notes above. Shut off power at the circuit breaker and remove old fixture from wall, including the old mounting strap. 1.
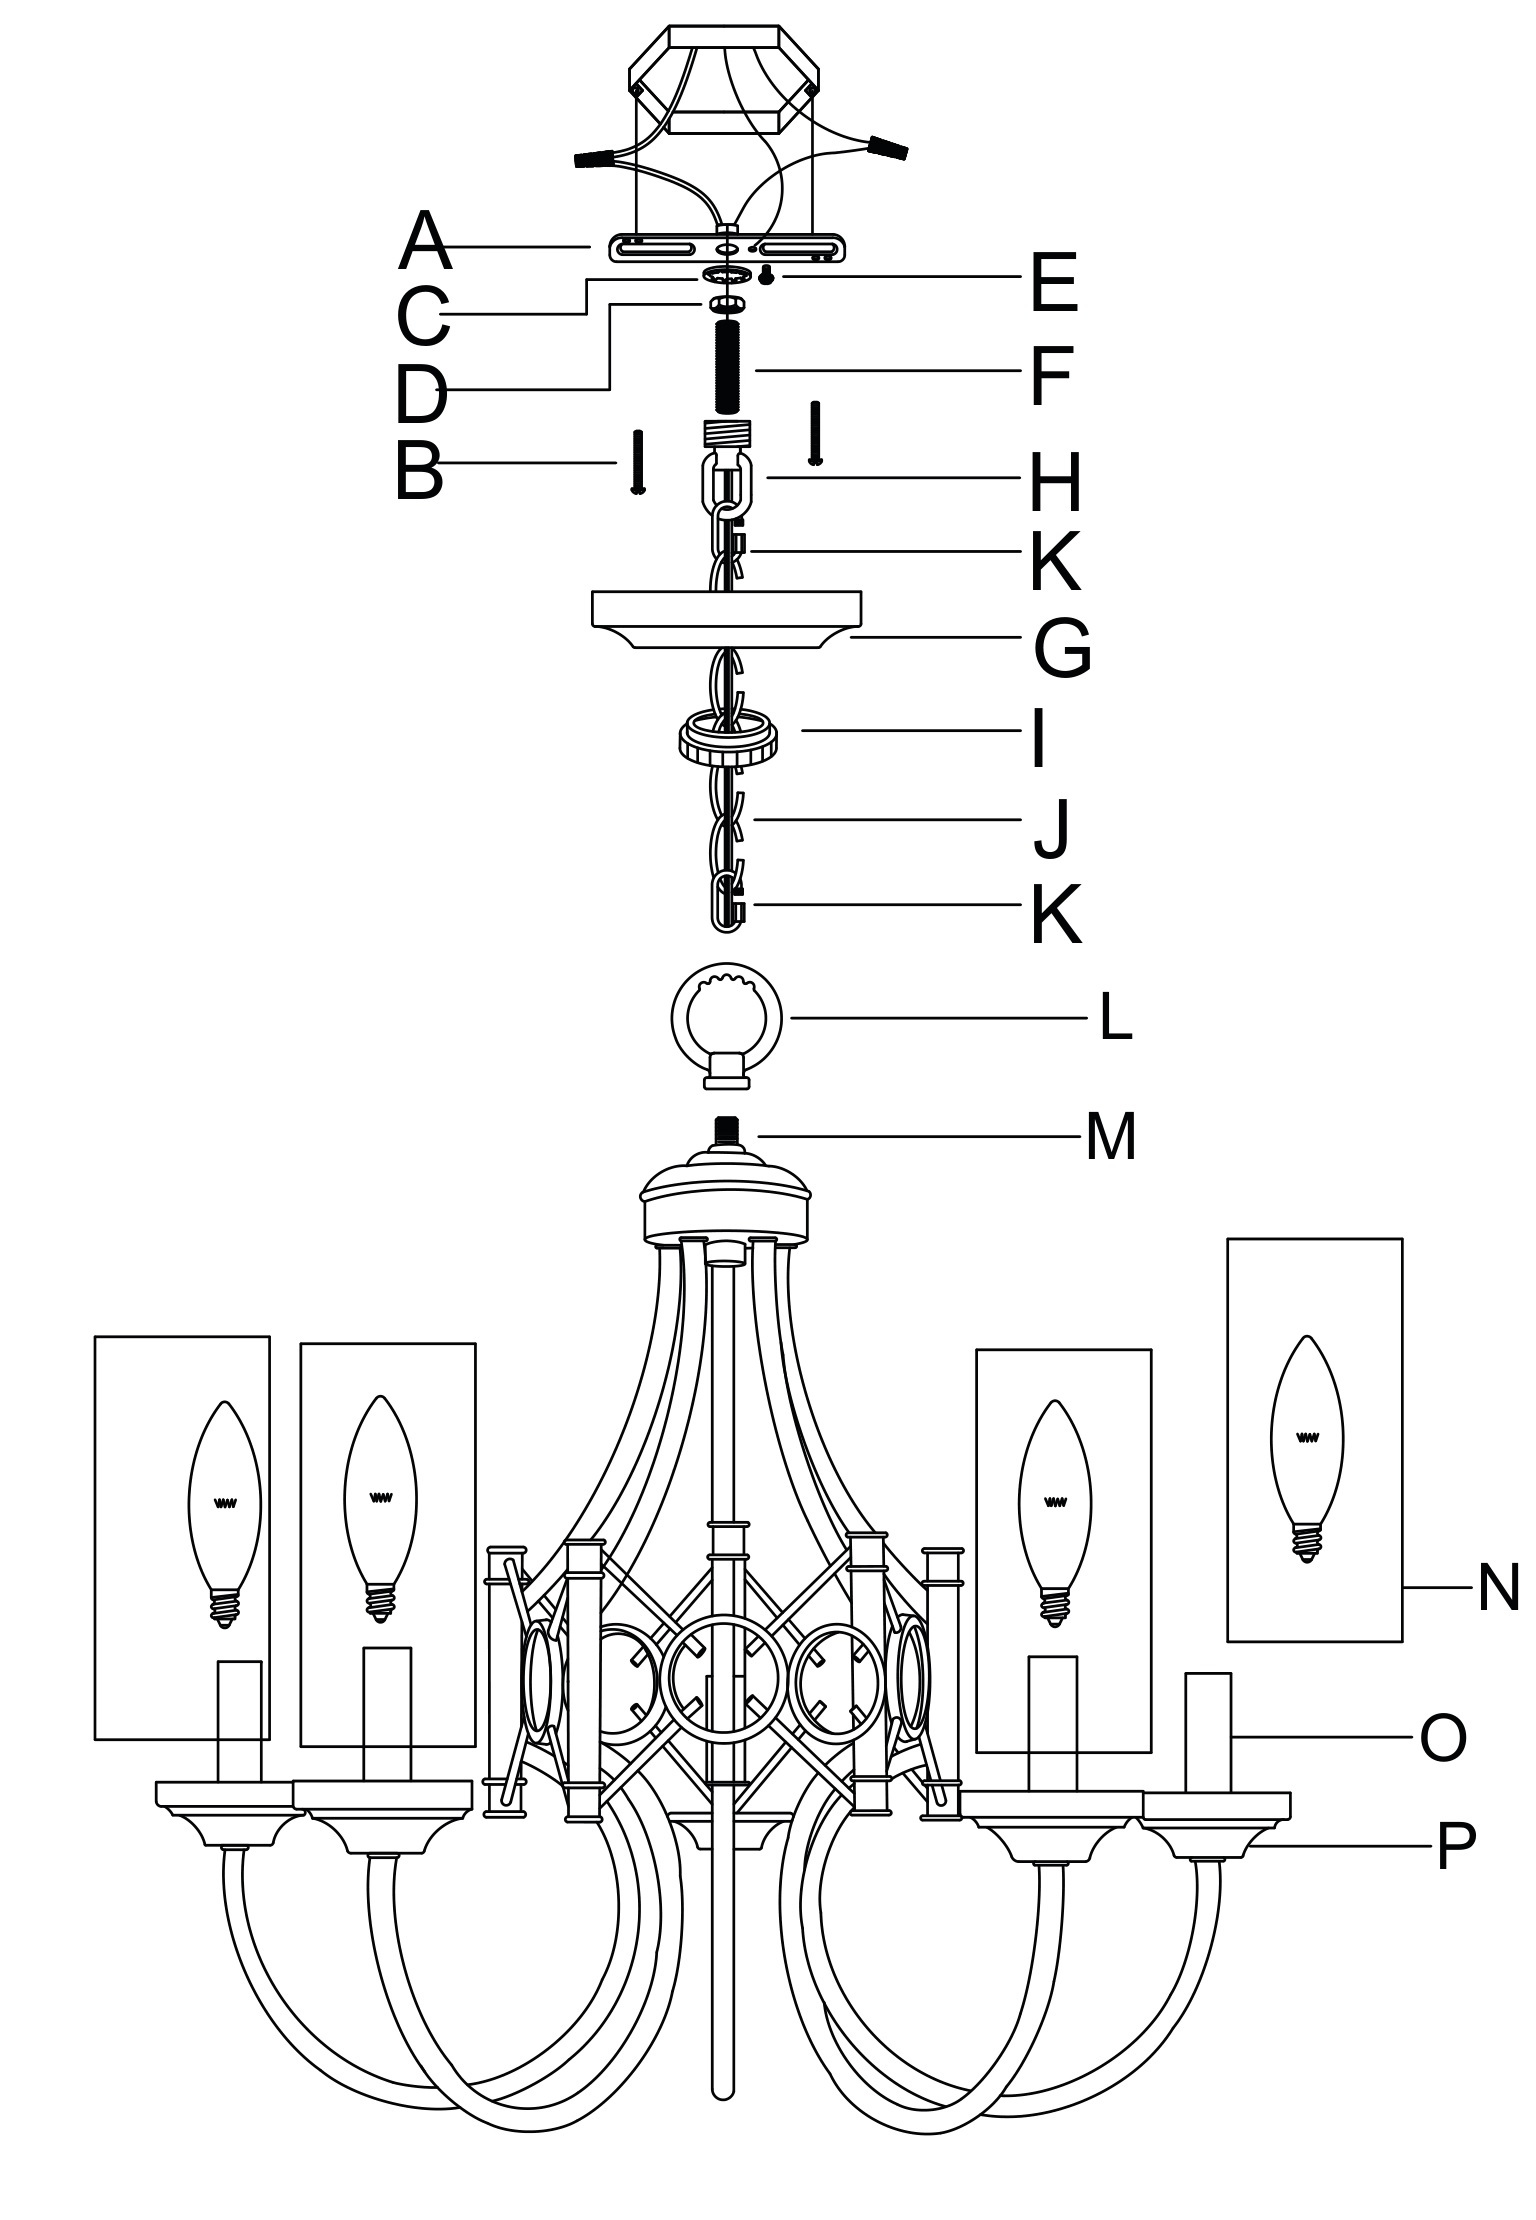
From the parts bag remove the mounting strap assembly. One end of nipple (F) should be attached to mounting strap (A) with washer (C) and hex nut (D) in place.
The other end should have canopy loop (H) attached. Attach mounting strap (A) to the junction box using mounting screws (B) and a screwdriver. Tighten securely.
Unscrew canopy loop collar (I) from canopy loop (H). Pass canopy (G) over the mounted canopy loop (H) to test the height. Approximately half of the canopy loop’s exterior threads should be exposed, and the canopy loop collar (I) should fit snugly onto the canopy loop (H). Remove canopy (G) and adjust the height of nipple (F) and canopy loop (H) until the desired height is reached.
ASSEMBLING THE FIXTURE
2. Measure to determine the correct number of chain links needed for proper hanging height. If necessary, use a pair of pliers to open and remove any excess chain. Attach one chain connector (K) to each end of chain (J). Attach chain/chain connector to top loop (L). Pull the wires until taut. Thread top loop (L) onto post (M). Attach the remaining end of the chain/chain connector to canopy loop (H). Close chain connectors (K) to secure. Feed fixture wires from post (M) through top loop (L), the chain (every three links or so), canopy loop collar (I), canopy loop (H), and canopy (G). Slide canopy loop collar (I) and canopy (G) down onto the chain/wires. Pull the wires until taut.
CONNECTING THE WIRES
3. Have an assistant support the fixture’s weight while completing the wiring. Refer to the wiring diagram and attach the fixture’s wires to the power supply wires from the junction box. Attach the fixture’s wires to the power supply wires from the junction box. Connect Hot to Hot (transparent wire with black inner thread, black, or smooth wire) Neutral to Neutral (transparent wire with white inner thread, white, or ribbed wire), and Ground to Ground (transparent wire with green inner thread, green wire, or copper). Twist the ends of the wire pairs together, and then twist on a wire connector. Make sure all twists are in the same direction. If there is no house ground wire coming from the junction box, locate ground screw (E) on the mounting bracket/mounting strap and wrap the fixture’s ground wire around the ground screw. Use a screwdriver to tighten the top of ground screw (E) onto the wires and into the mounting bracket/mounting strap. Tuck the wires into the junction box.
FINISHING THE INSTALLATION
4. Push canopy (G) up to the ceiling and slide canopy loop collar (I) up beneath the canopy (G). Tightly thread canopy loop collar (I) onto canopy loop (H) to secure canopy (G) in place. 5. Install light bulbs (not provided) into sockets (P) in accordance with the fixture’s specifications. Do not exceed the maximum recommended wattage. Slide glass shades (N) over cap (O). Your installation is now complete. Turn on the power and test the fixture.