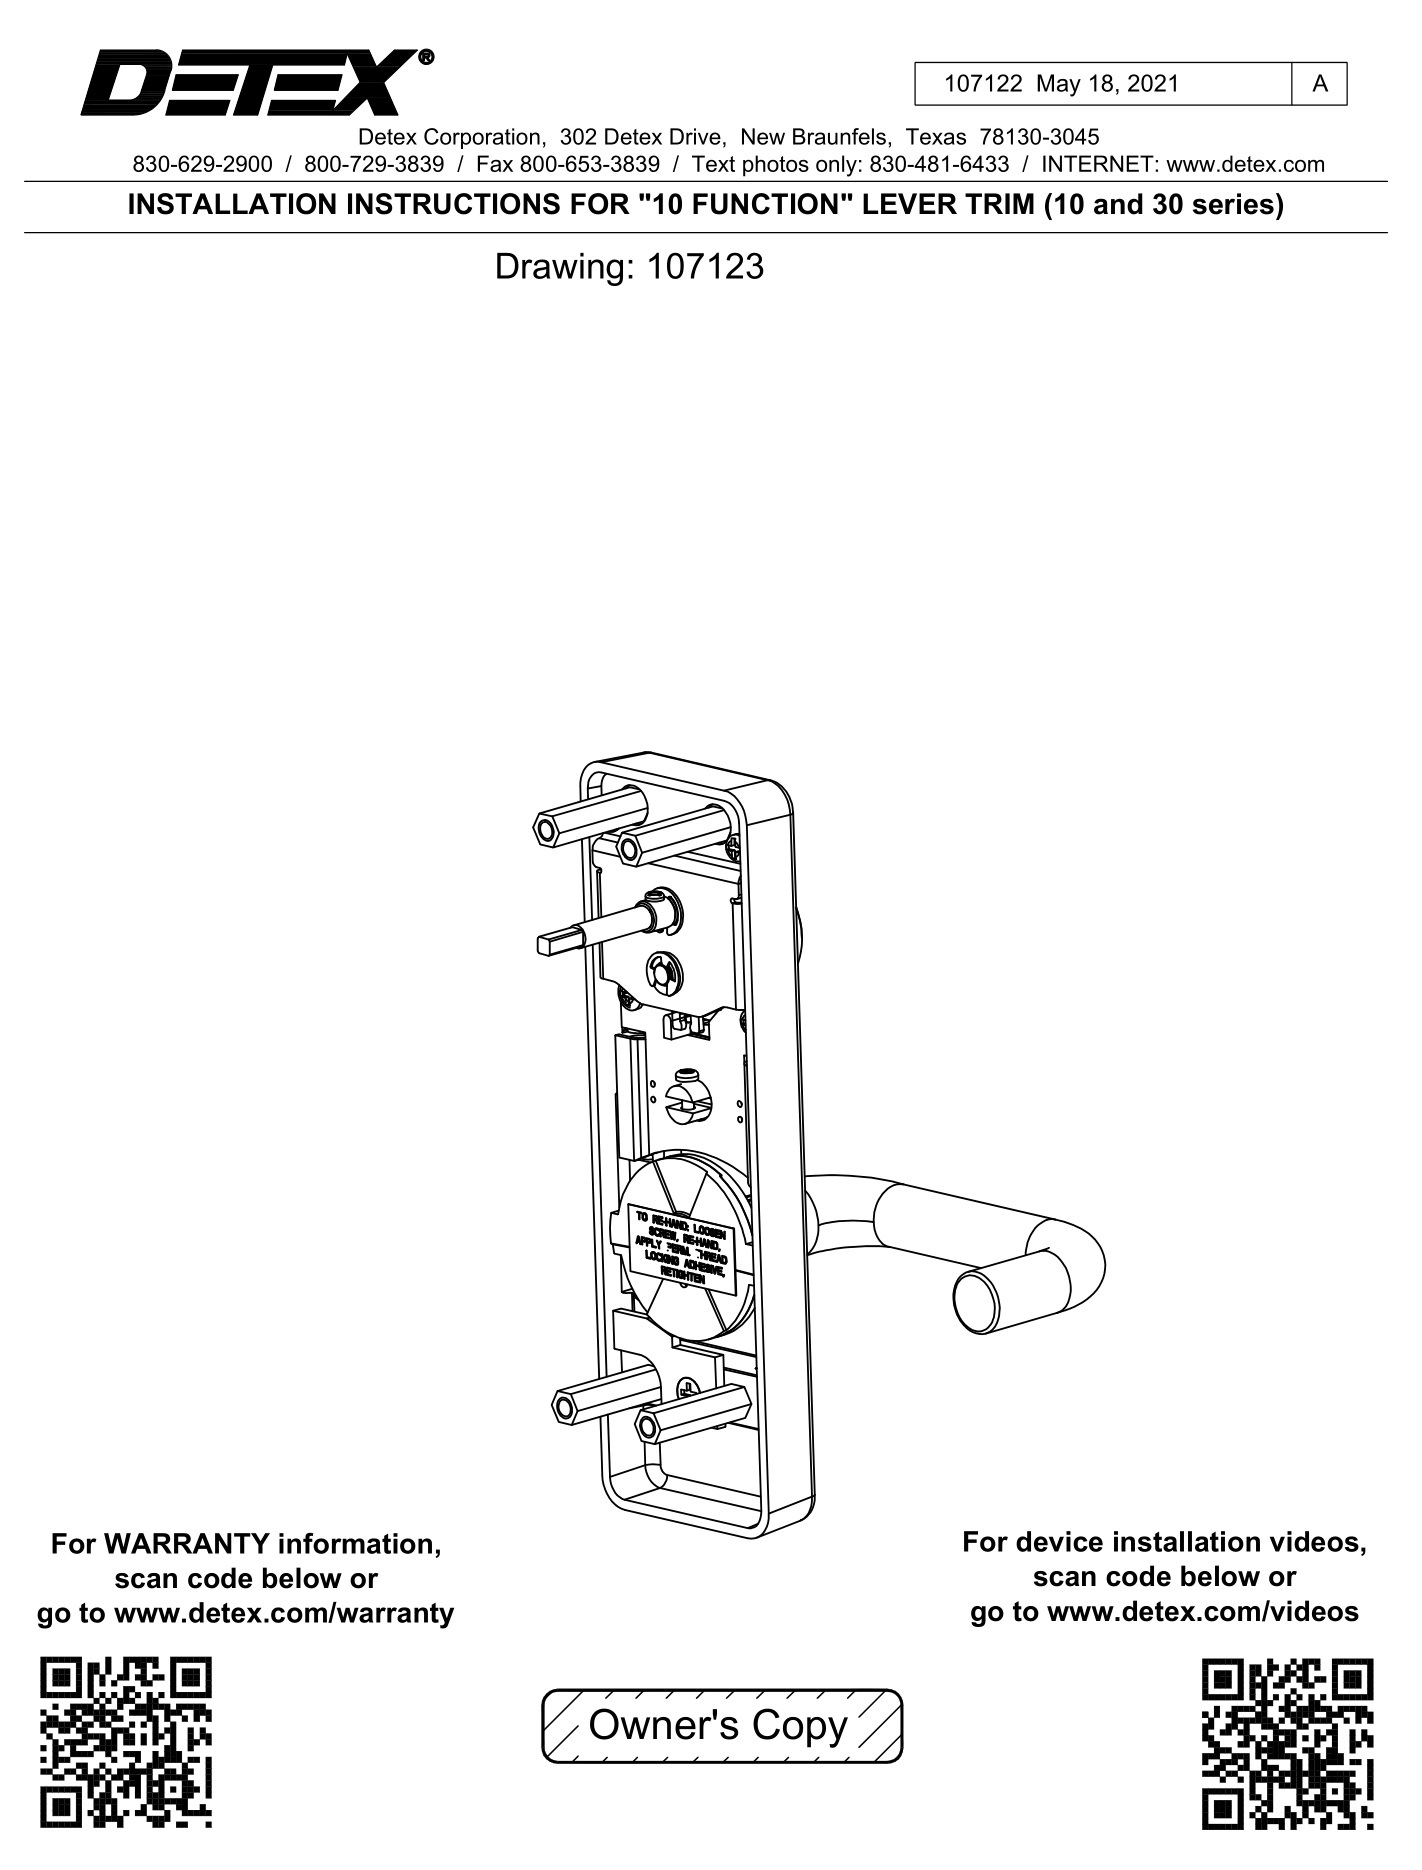
DETEX 107123 10 Function Lever Trim
Instruction Manual
www.detex.com
www.detex.com/warranty
www.detex.com/videos
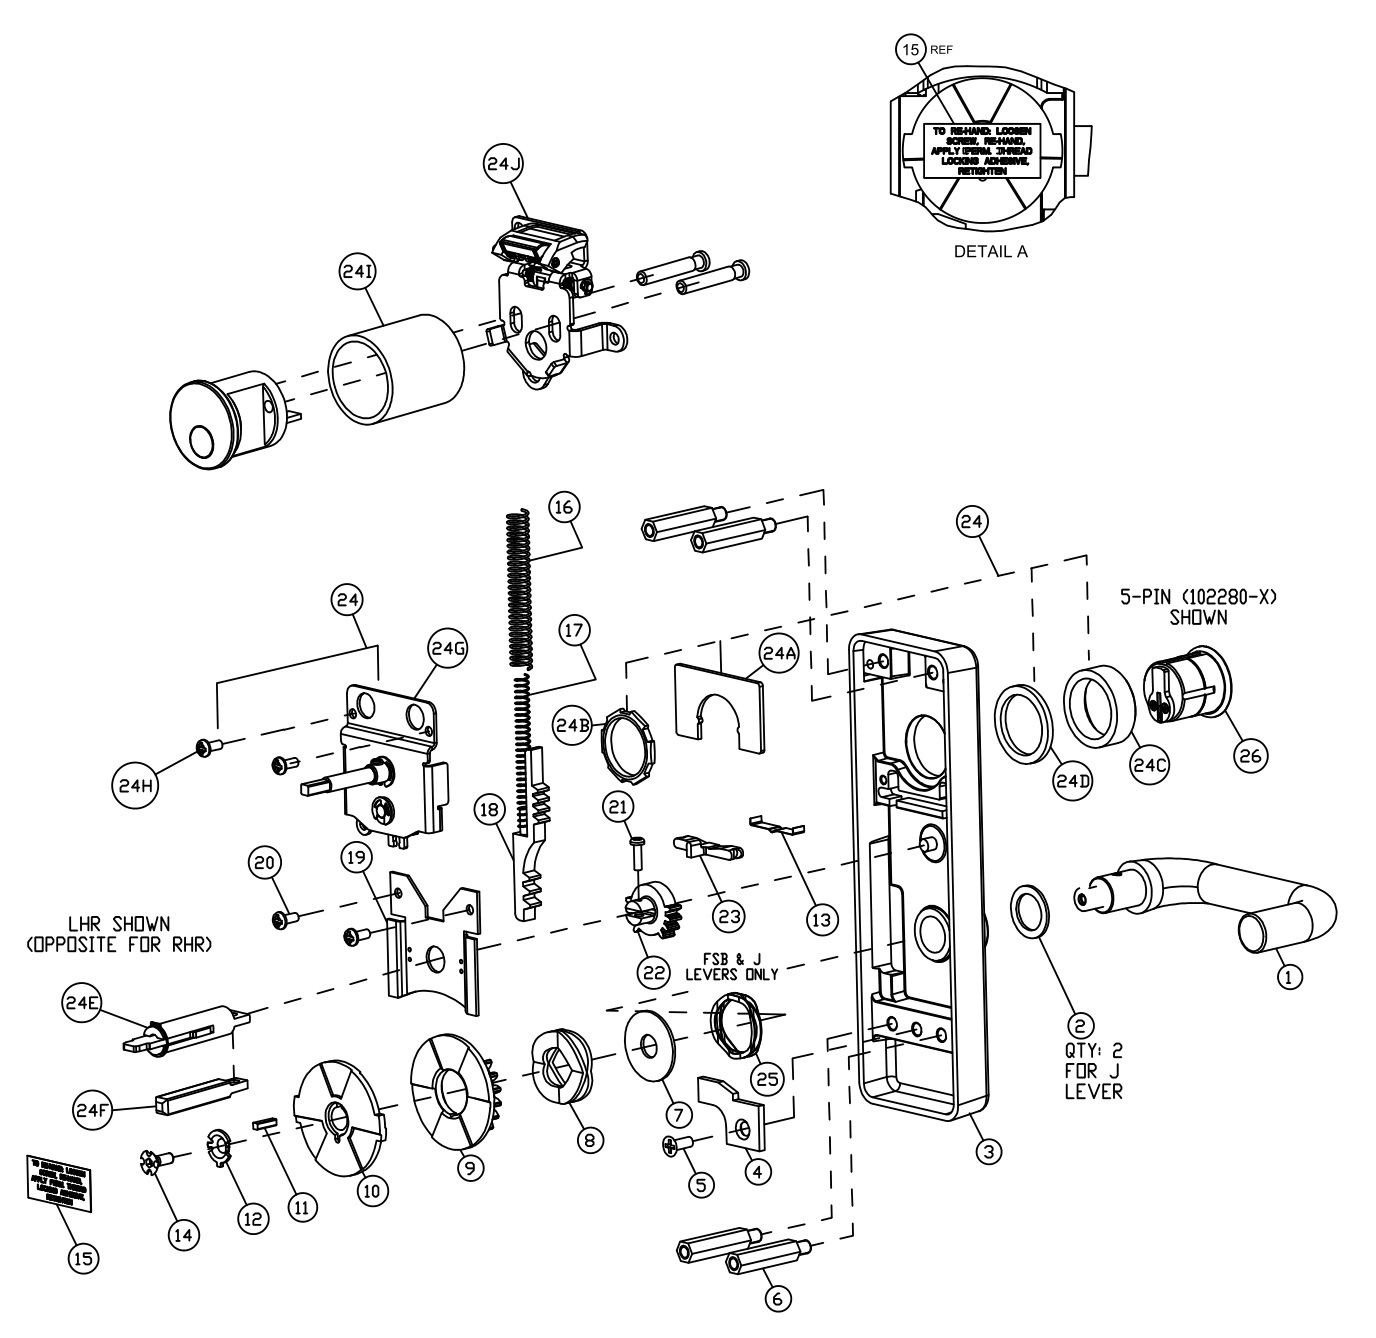
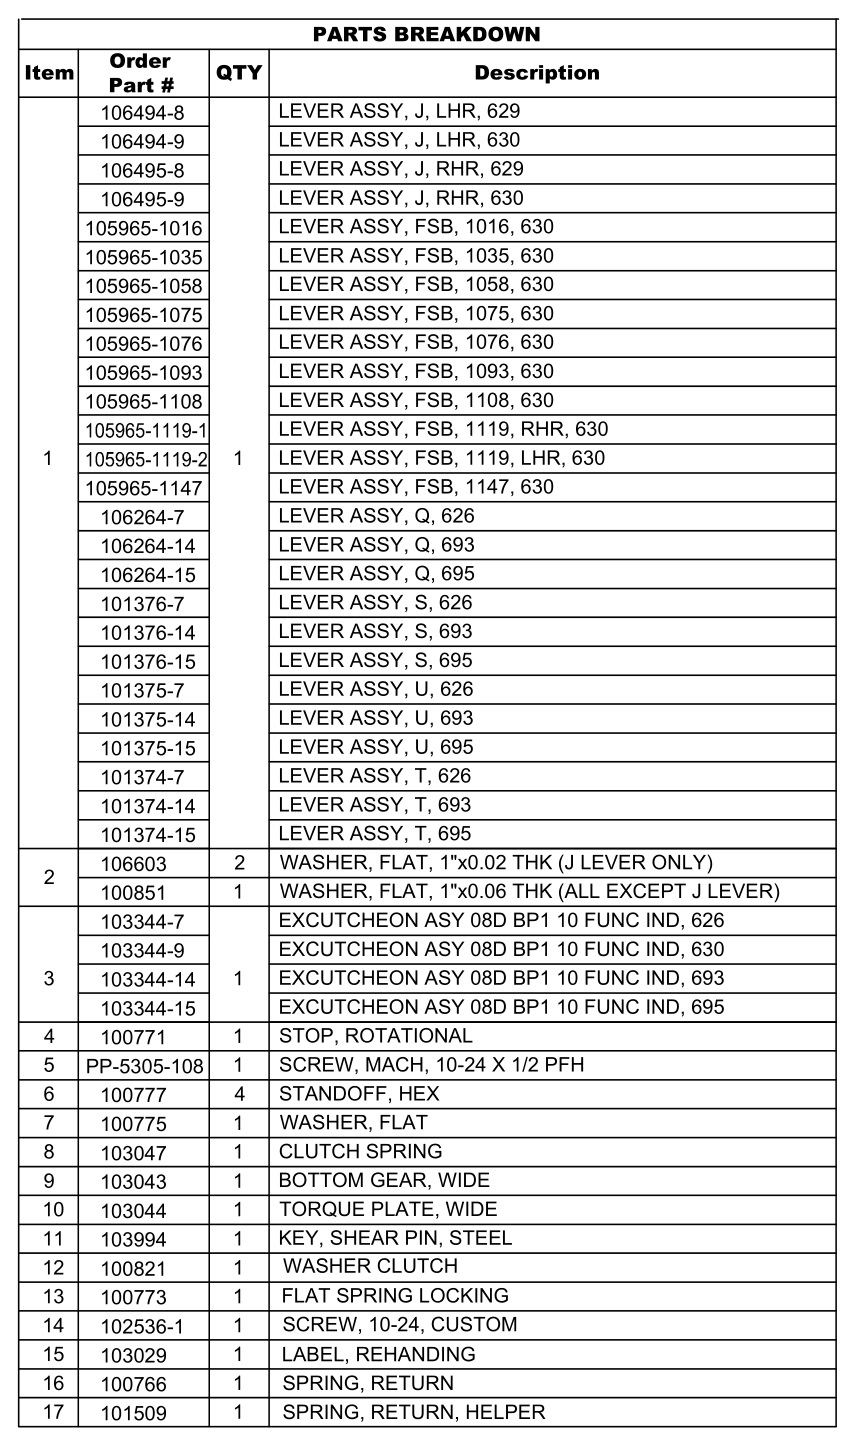
Your particular part or configuration may not be shown:
Contact Detex technical support
at 800-729-3839 (option 2)
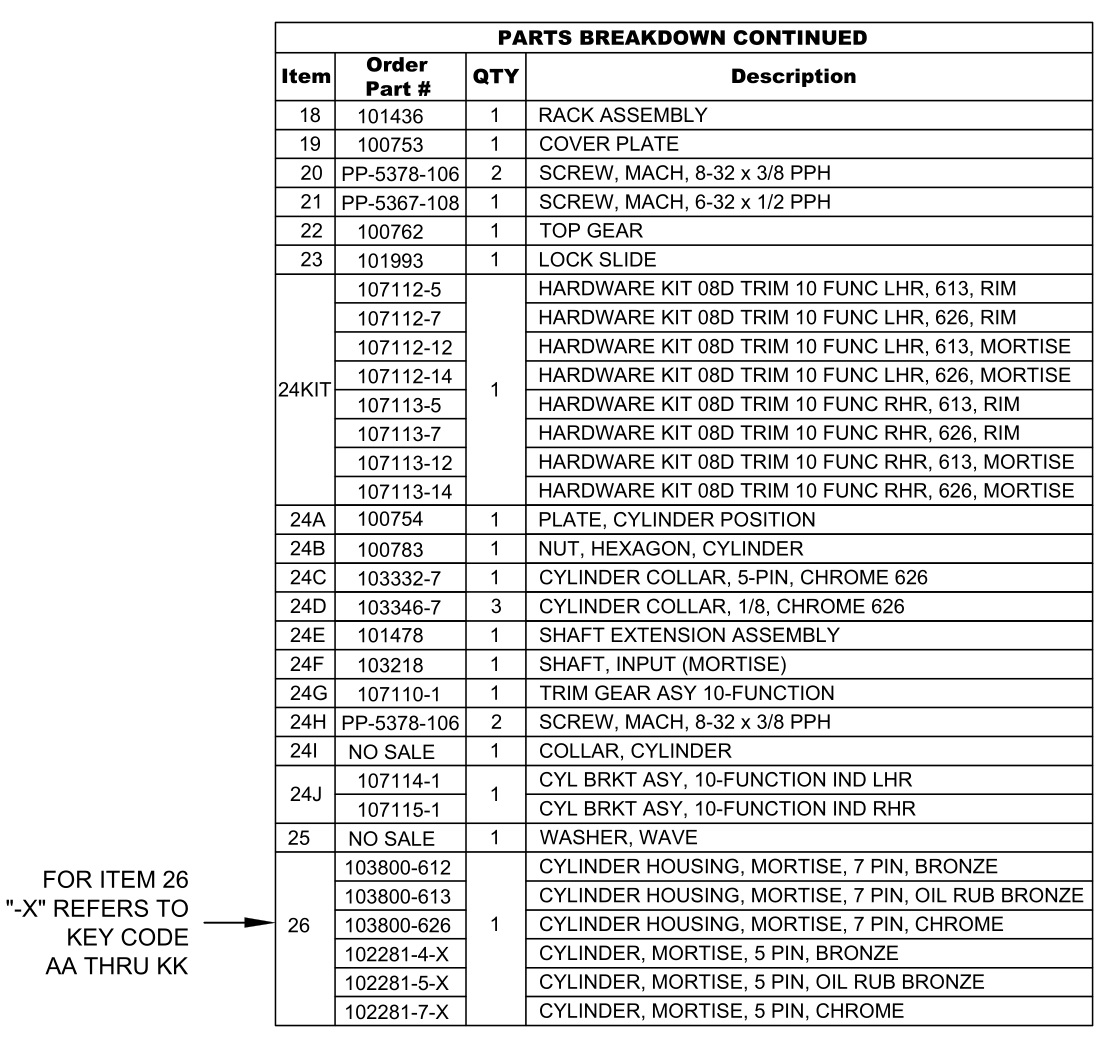
Your particular part or configuration may not be shown:
Contact Detex technical support at 800-729-3839 (option 2)
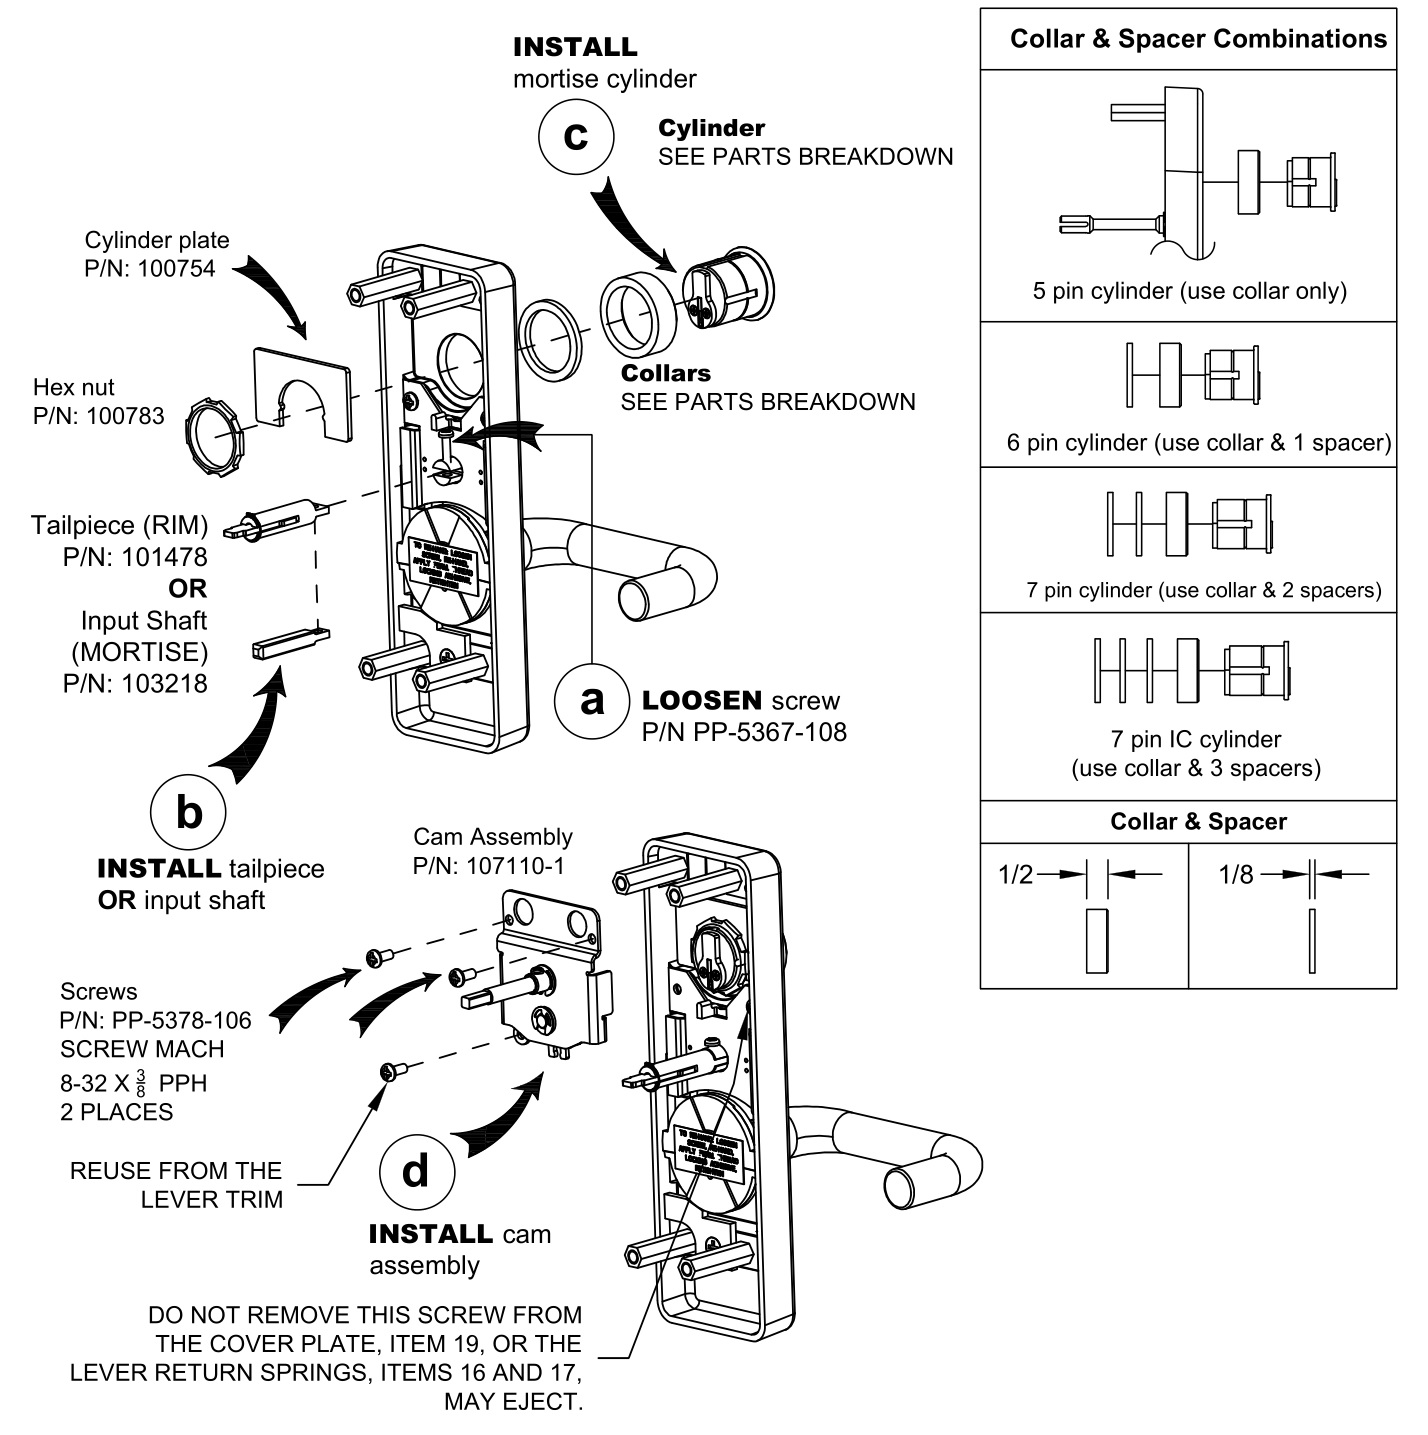
STEP 1: PREP TRIM
NOTE:
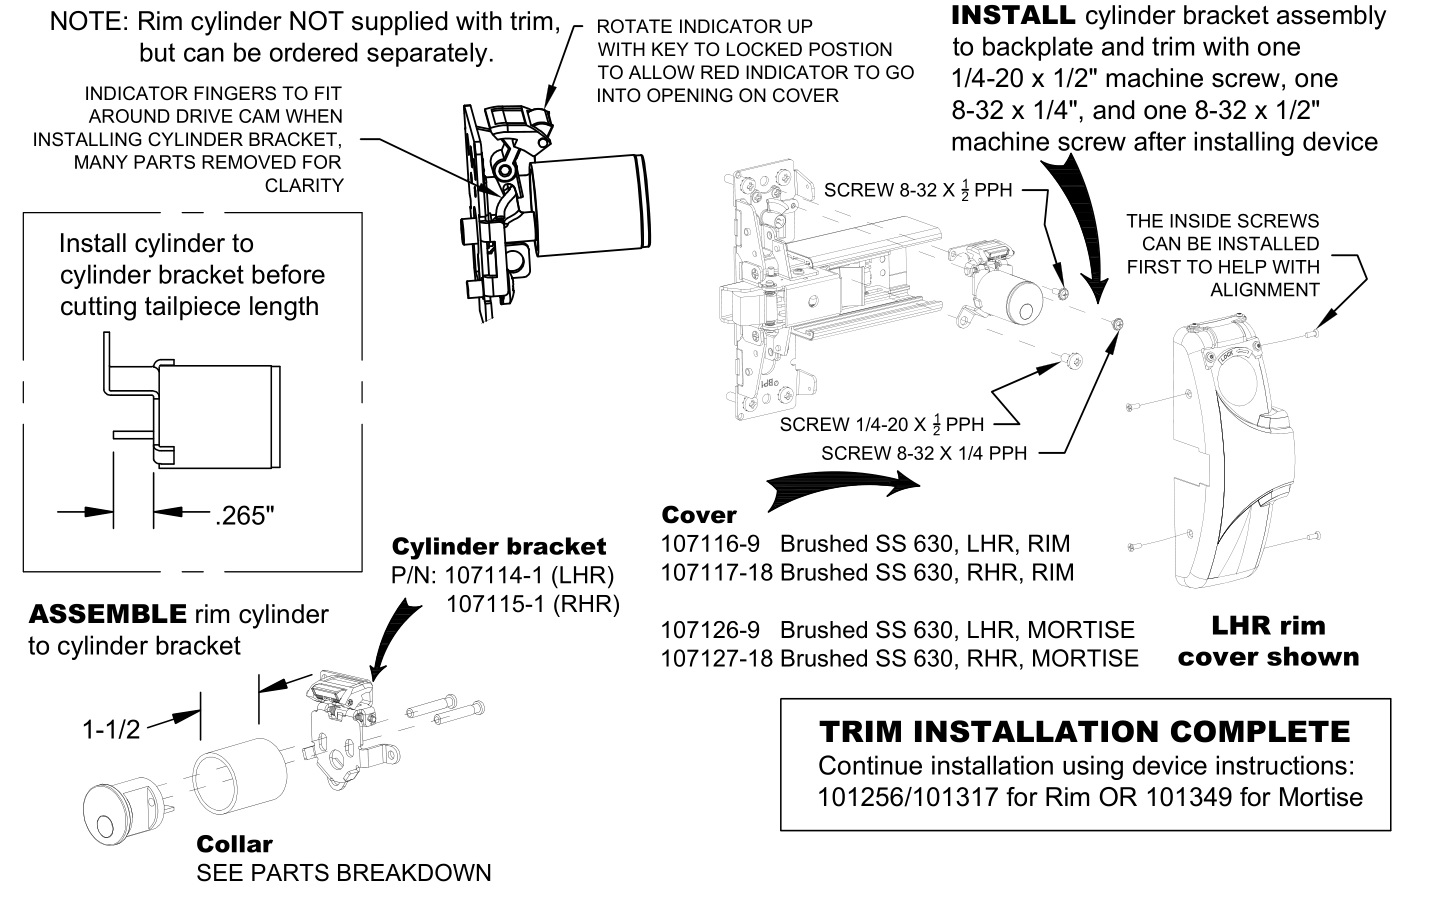
- Mortise cylinder NOT supplied with trim, but can be ordered separately.
- Trim handing is field reversible. Device cover is handed and must be ordered RHR or LHR (see step 4).
- 6-pin cylinder installation shown.
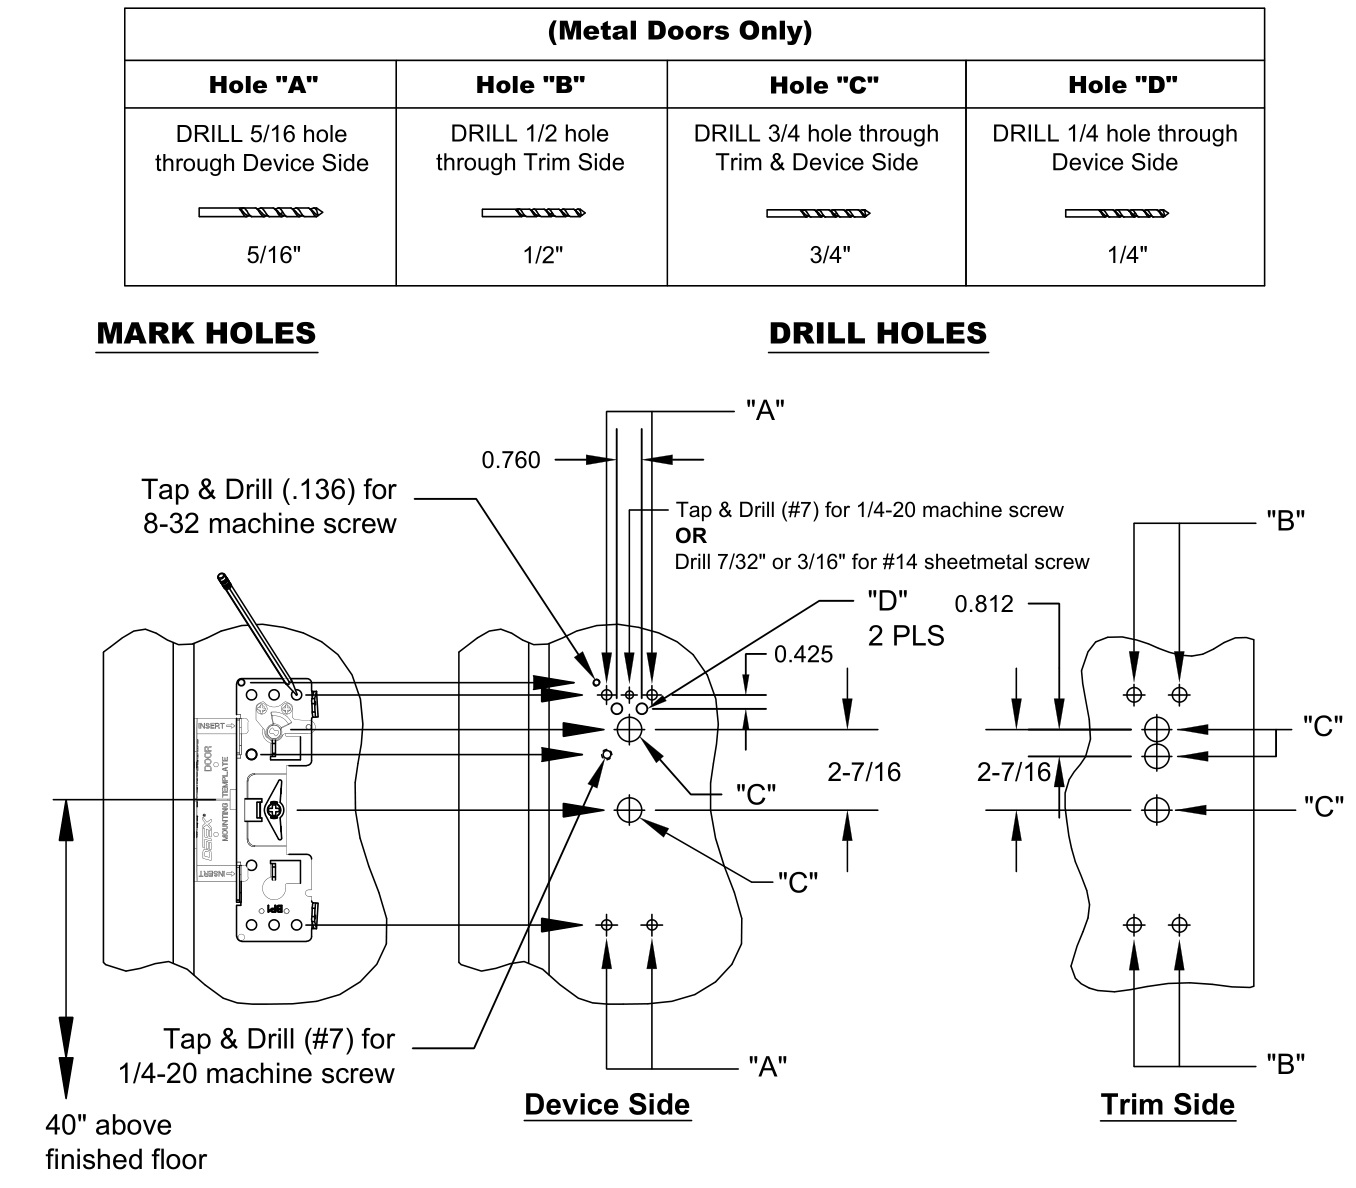
STEP 2: PREP DOOR (Rim)
Mark and drill holes
(LHR installation shown, reverse all steps for RHR)
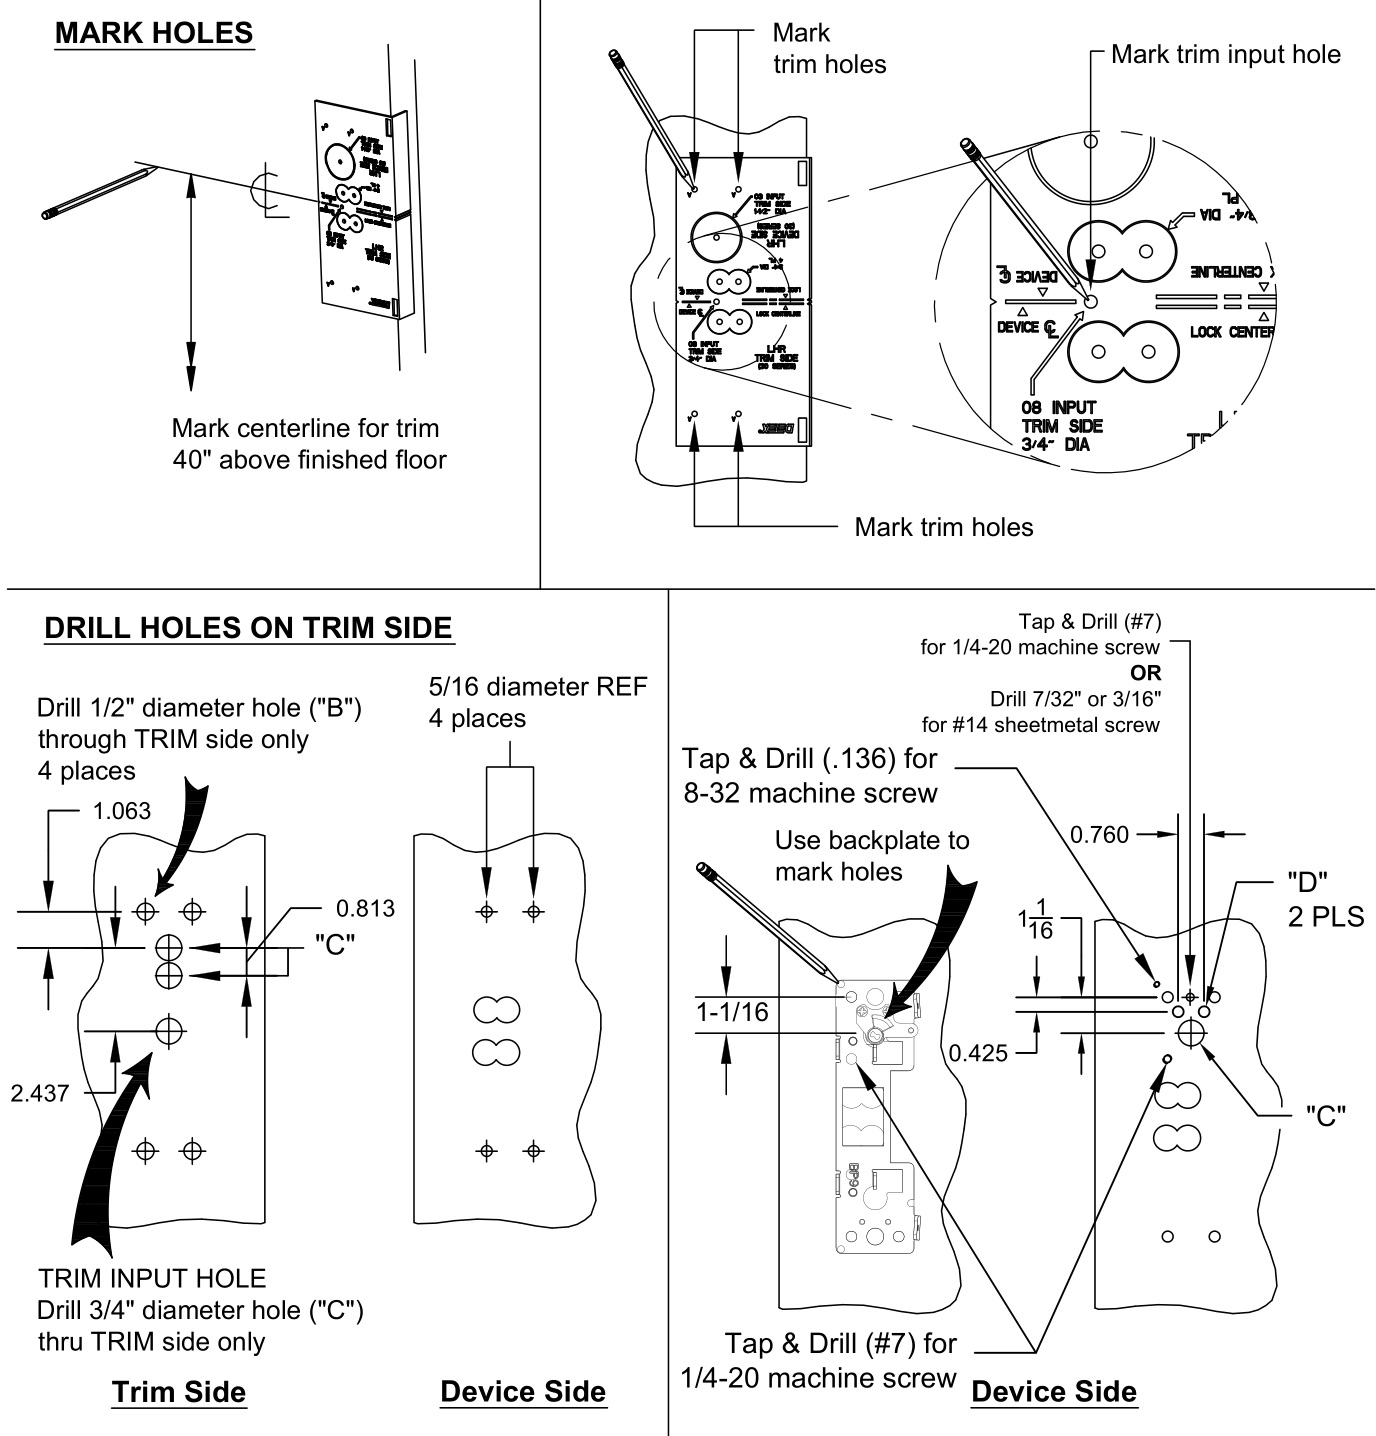
STEP 2: PREP DOOR (Mortise)
TRIM SIDE: Use plastic template to mark and drill TRIM holes
(LHR installation shown, reverse all steps for RHR)
NOTE:
1) For a retrofit application, remove mortise lock (if required) and device before installing new trim.
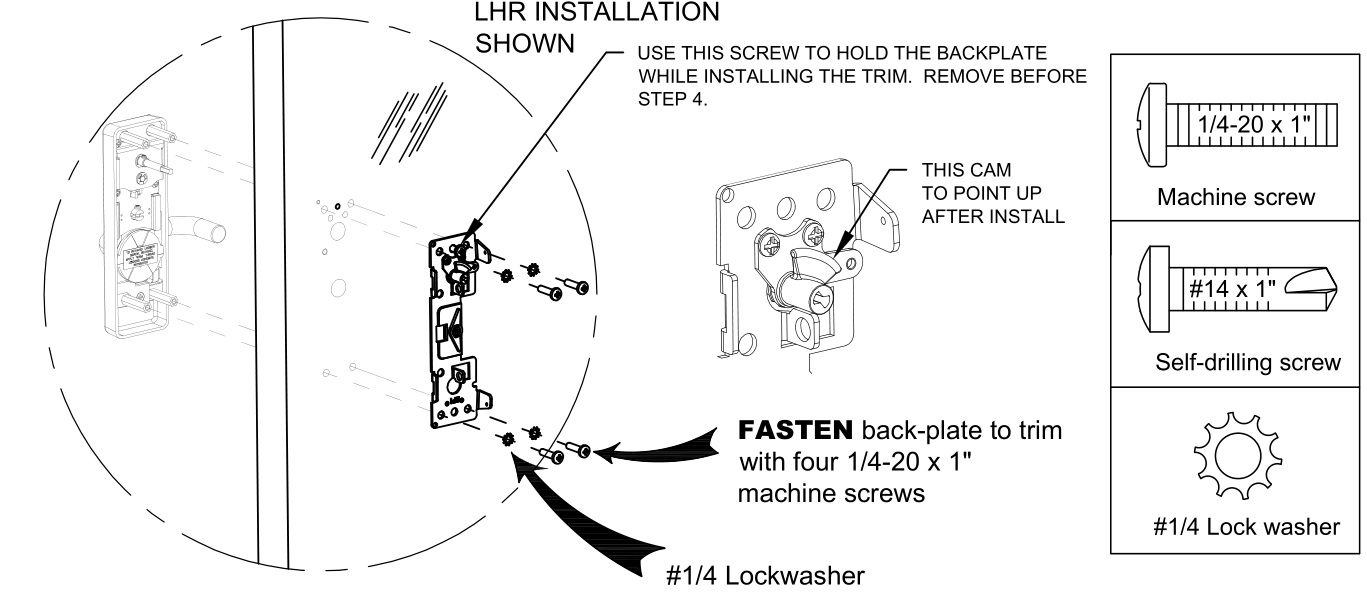
STEP 3: INSTALL TRIM
(RIM installation shown)
STEP 4: INSTALL DEVICE AND BRACKET ASSEMBLY
(RIM installation shown)
