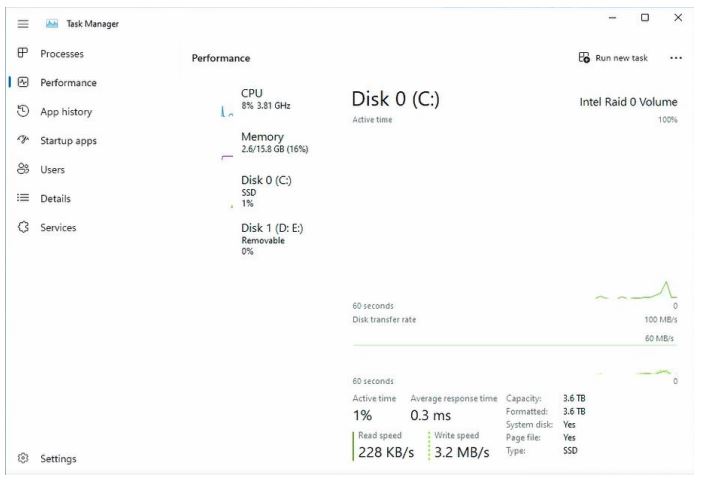
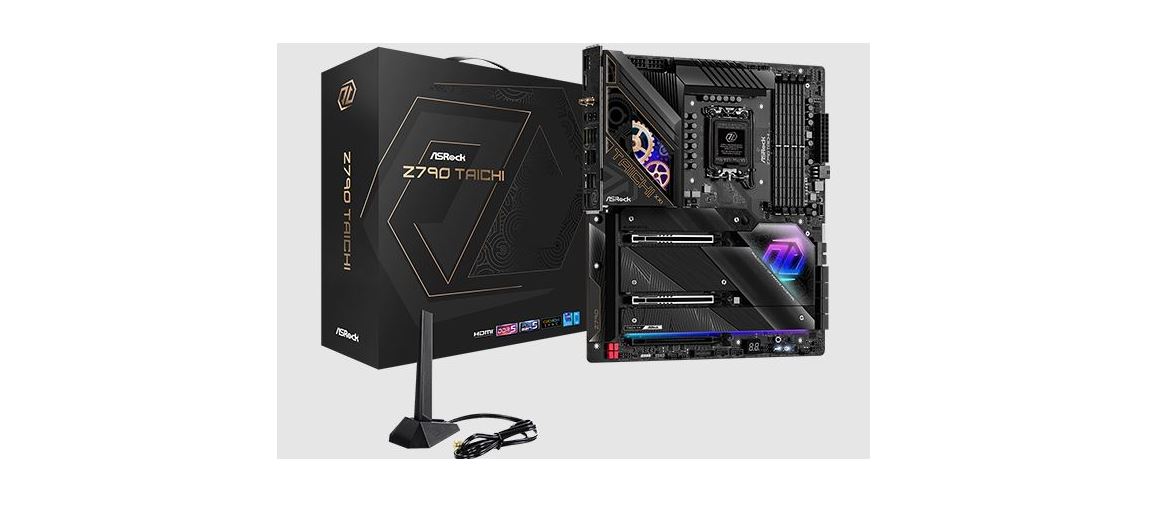
ASRock Z790 Taichi Motherboard
Instruction Manual

Configuring a RAID array Using UEFI Setup Utility
The BIOS screenshots in this guide are for reference only and may differ from the exact settings for your motherboard. The actual setup options you will see shall depend on the motherboard you purchase. Please refer to the product specification page of the model you are using for information on RAID support. Because the motherboard specifications and the BIOS software might be updated, the content of this documentation will be subject to change without notice.
STEP 1:
Enter the UEFI Setup Utility by pressing or right after you power on the computer.
STEP 2:
Go to Advanced\Storage Configuration\VMD Configuration and set Enable VMD controller to [Enabled].
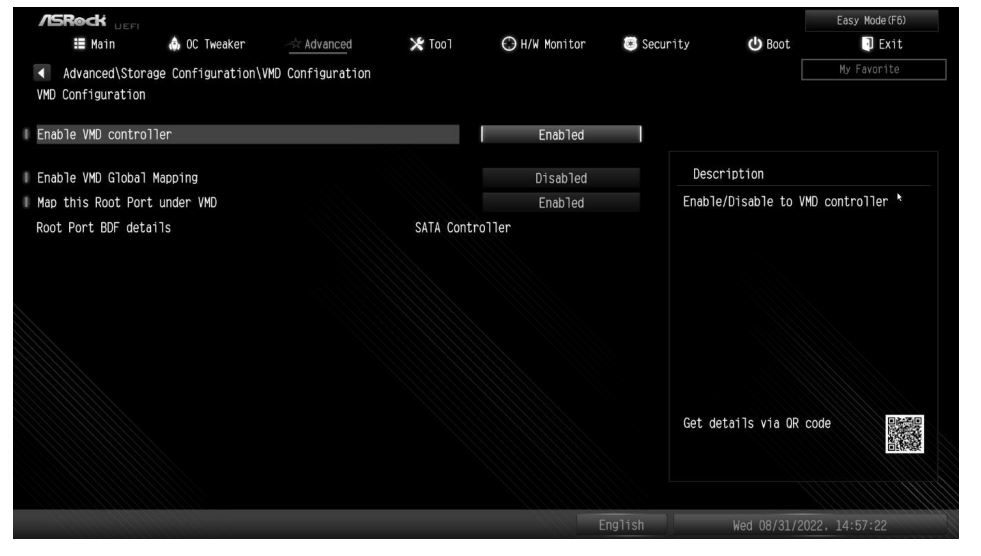
Then set Enable VMD Global Mapping to [Enabled]. Next, press to save the configuration changes and exit setup.
![ASRock Z790 Taichi Motherboard - Then set Enable VMD Global Mapping to [Enabled]](http://manual.directory/wp-content/uploads/2022/10/ASRock-Z790-Taichi-Motherboard-Then-set-Enable-VMD-Global-Mapping-to-Enabled.jpg)
STEP 3.
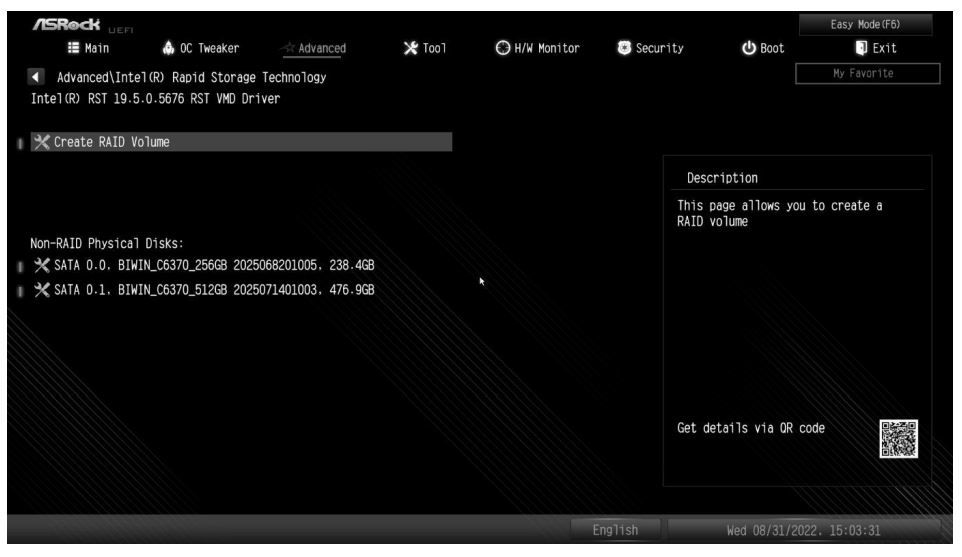
Enter Intel(R) Rapid Storage Technology in the Advanced page.
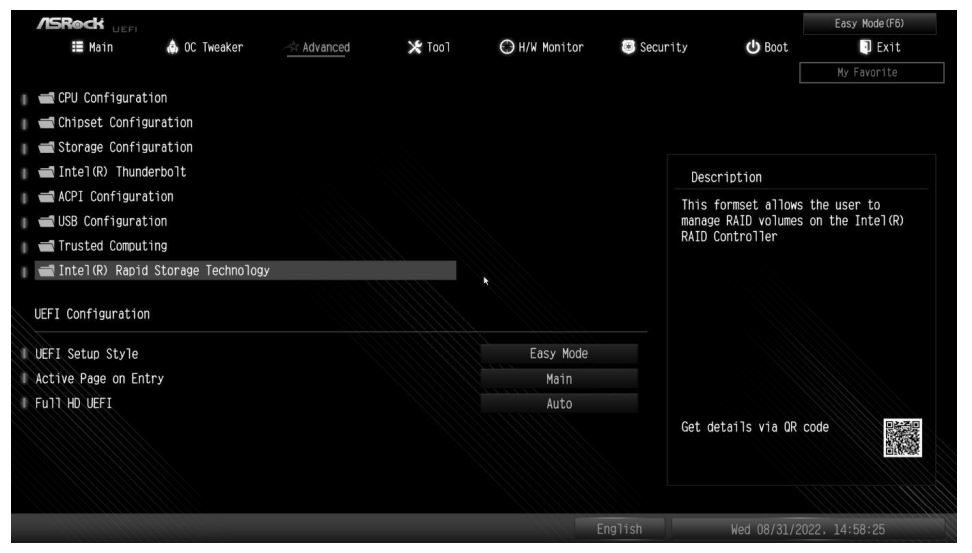
STEP 4:
Select the option Create RAID Volume and press .
STEP 5:
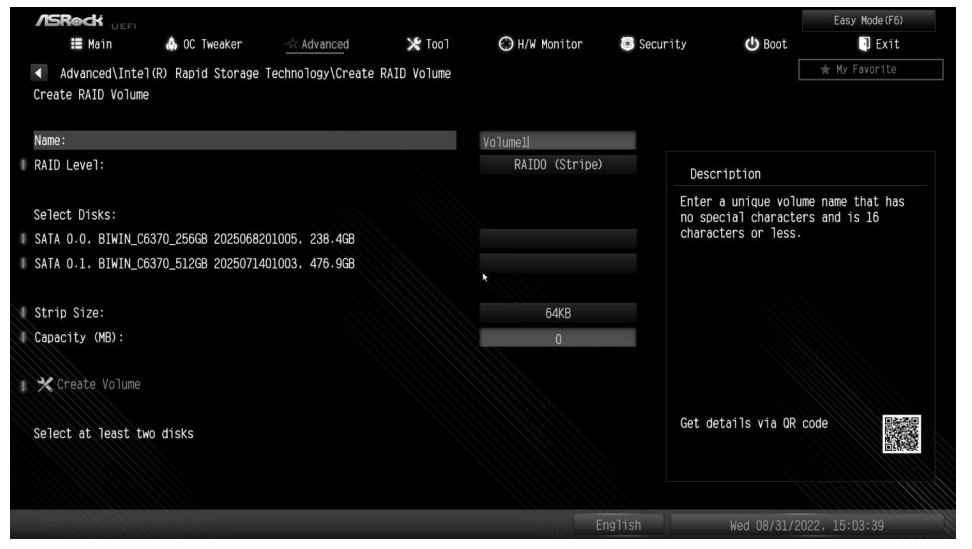
Key-in a volume name and press , or simply press to accept the default name.
STEP 6:
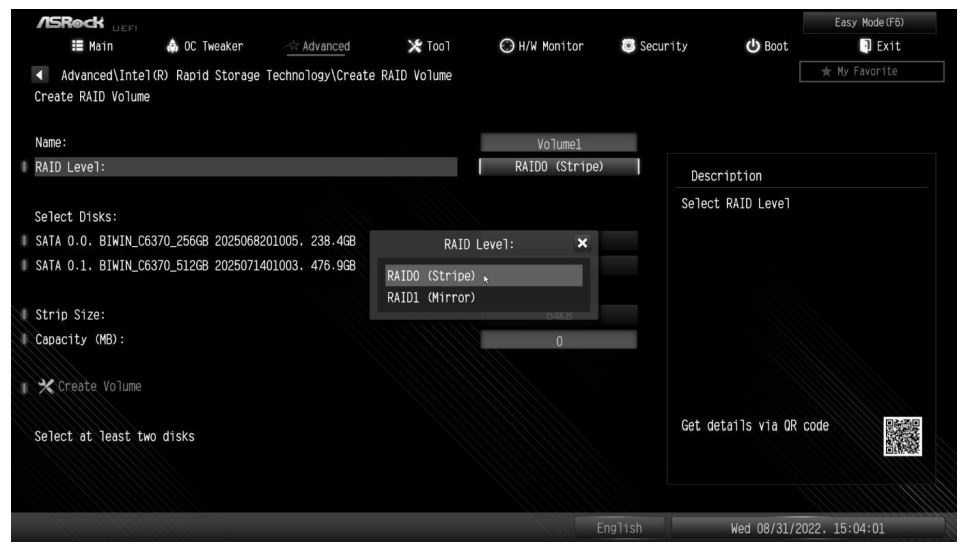
Select your desired RAID Level and press .
STEP 7:
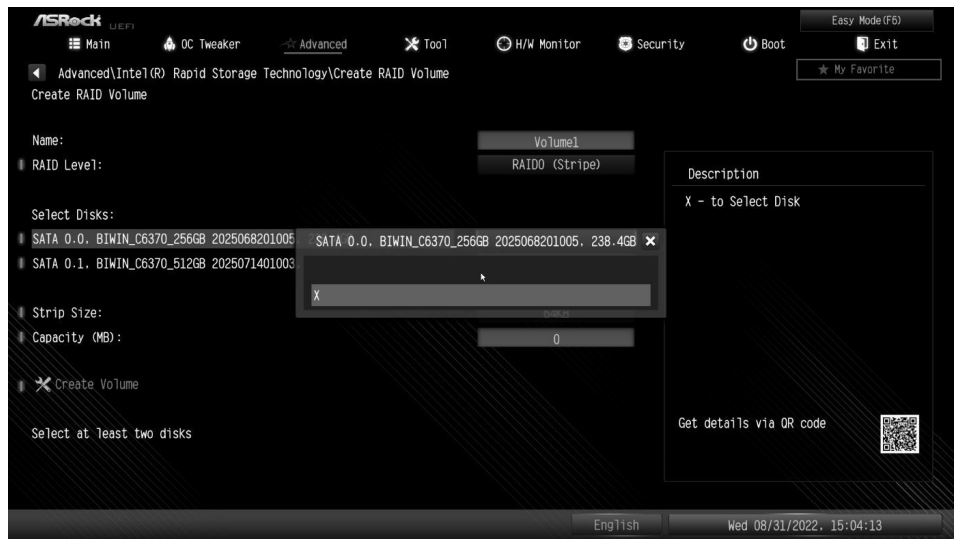
Select the hard drives to be included in the RAID array and press .
STEP 8:
Select a stripe size for the RAID array or use the default setting and press .
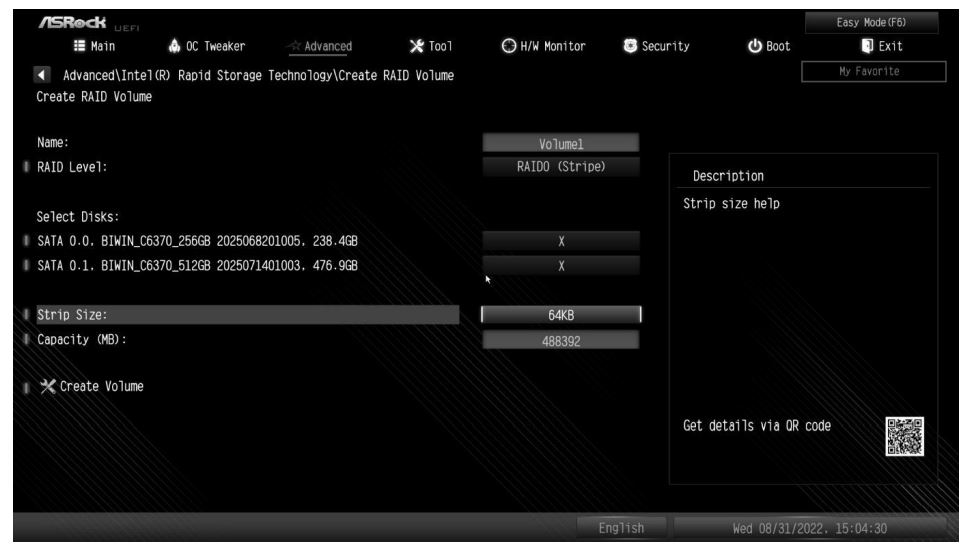
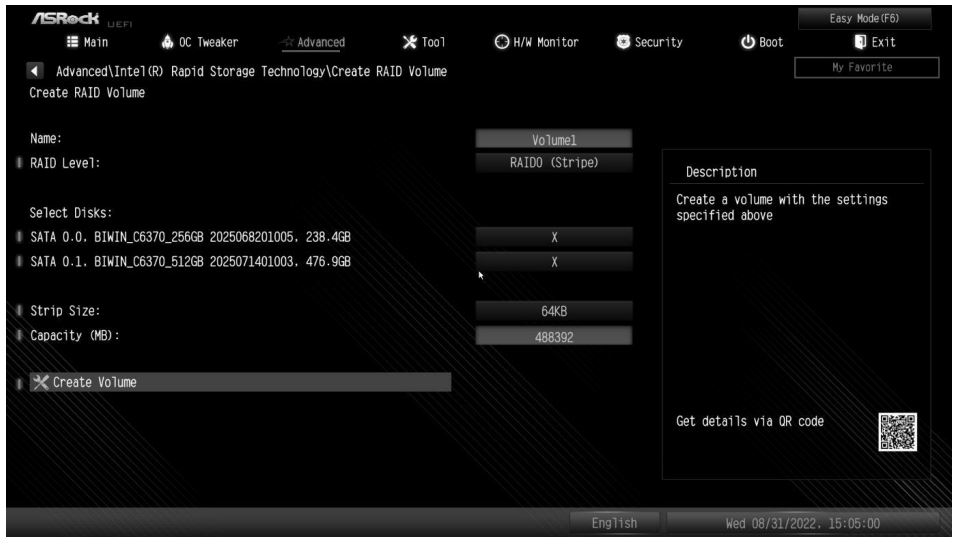
STEP 9:
Select Create Volume and press to start creating the RAID array.
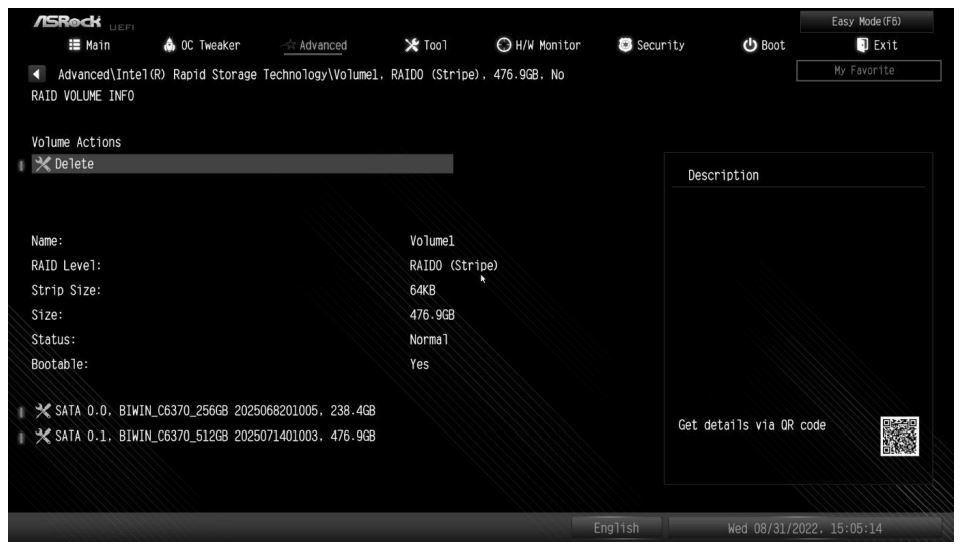
If you want to delete a RAID volume, select the option Delete on the RAID volume info page and press .
*Please note that the UEFI screenshots shown in this installation guide are for reference only.
Please refer to ASRock’s website for details about each model motherboard.
https://www.asrock.com/index.asp
Installing Windows® on a RAID volume
After the UEFI and RAID BIOS setup, please follow the steps below.
STEP 1
Please download the drivers from ASRock’s website (https://www.asrock.com/index.asp) and unzip the files to a USB flash drive.
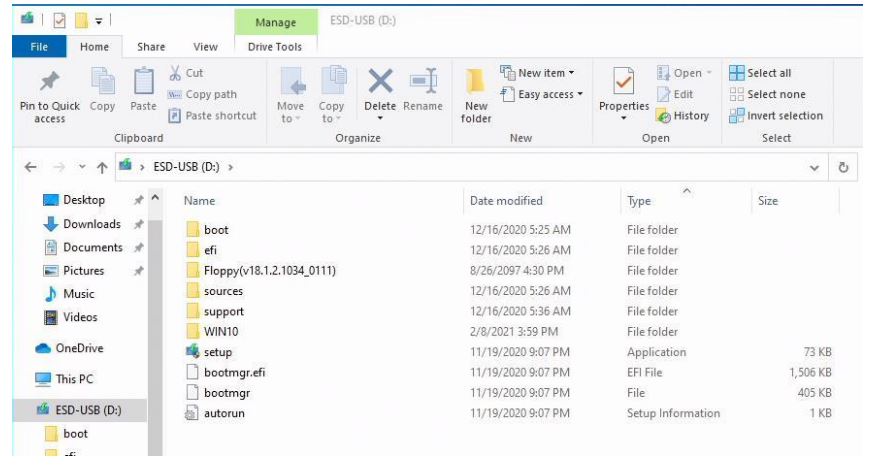
STEP 2
Press at system POST to launch the boot menu and choose the item “UEFI: ” to install Windows® 10 64-bit OS.

STEP 3 (If the drive that you plan to install Windows is available, please go to STEP 6)
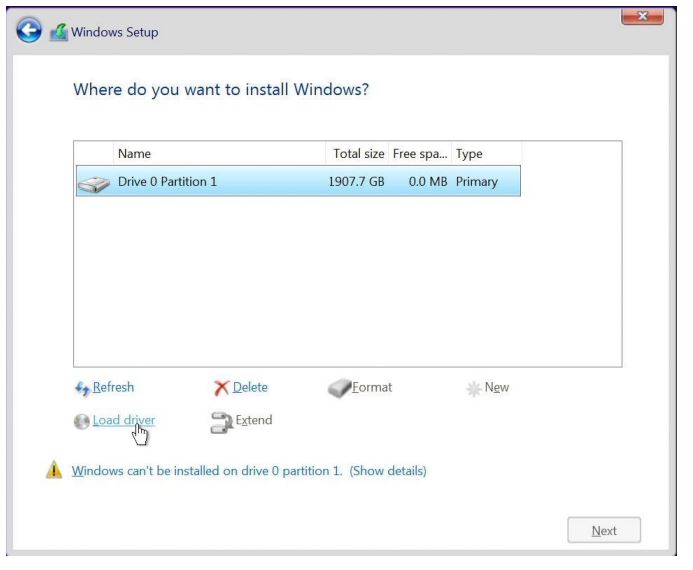
If during the Windows installation process the target drive is not available, please click <Load Driver>.
STEP 4
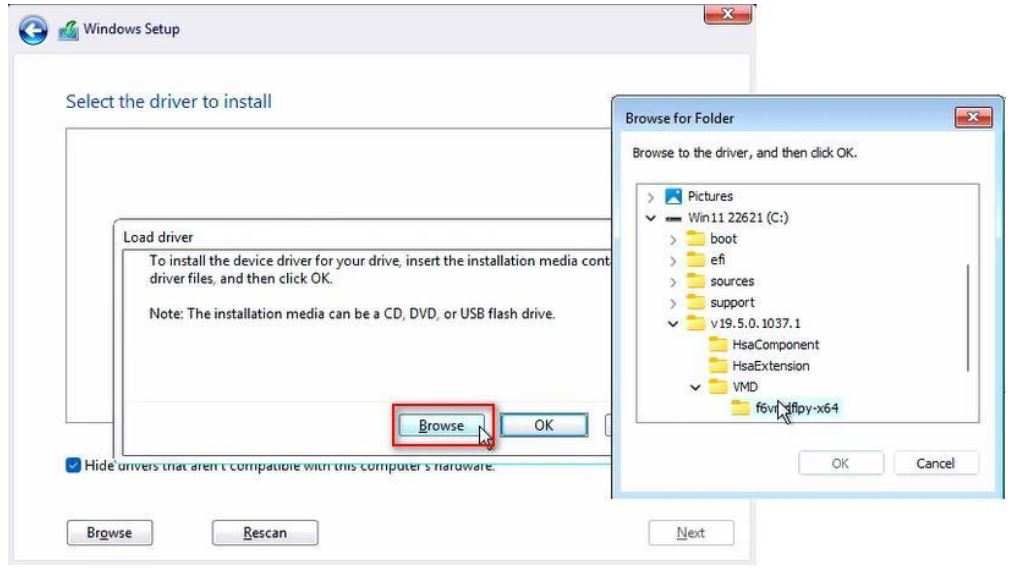
Click to find the driver on your USB flash drive.
STEP 5
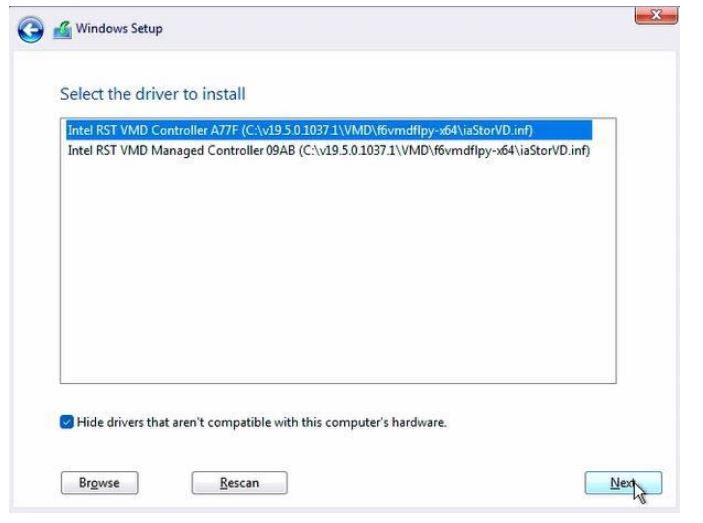
Select “Intel RST VMD Controller” and then click .
STEP 6
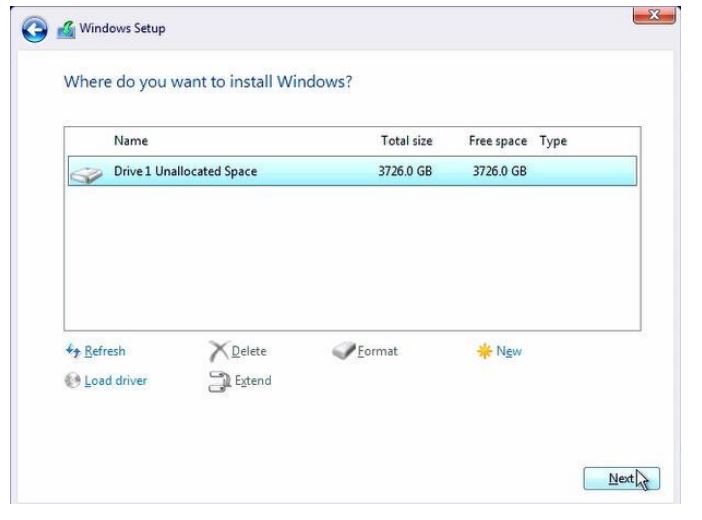
Select unallocated space and then click <Next>.
STEP 7
Please follow Windows’ installation instructions to finish the process.
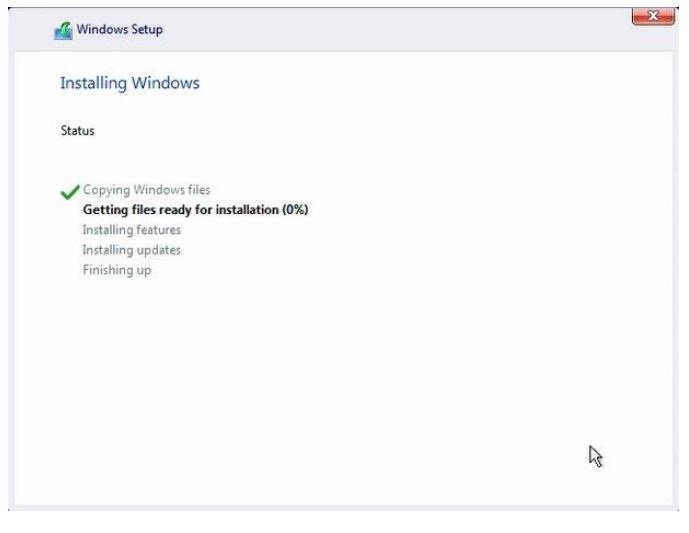
STEP 8
After the Windows installation is finished, please install the Rapid Storage Technology driver and utility from ASRock’s website. https://www.asrock.com/index.asp
