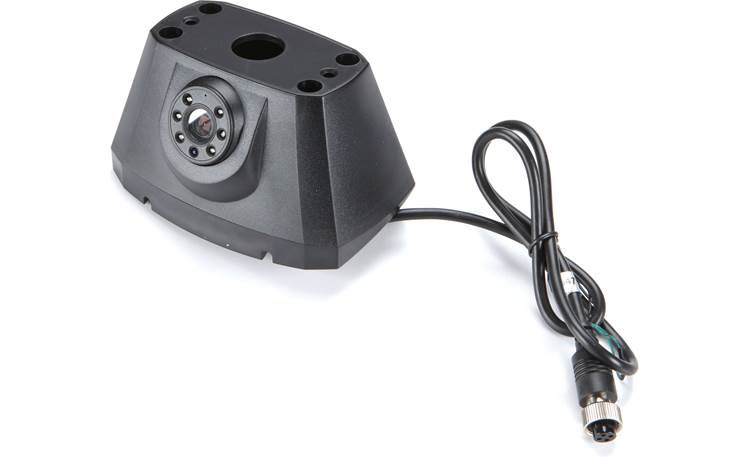

PRODUCT FEATURES:
– Selectable Parking Guide Line with ON/OFF option.
– With manually adjustable viewing angle.
– Includes all necessary installation hardware.
– Maintains the OEM look of the Van.
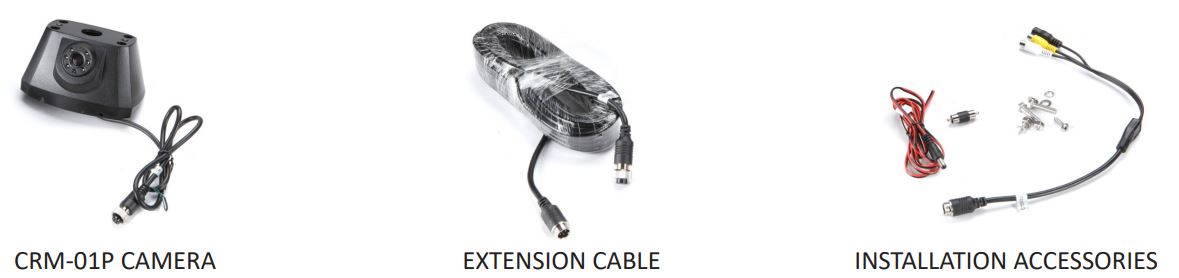
PARTS INCLUDED:
INSTALLATION DIAGRAM:
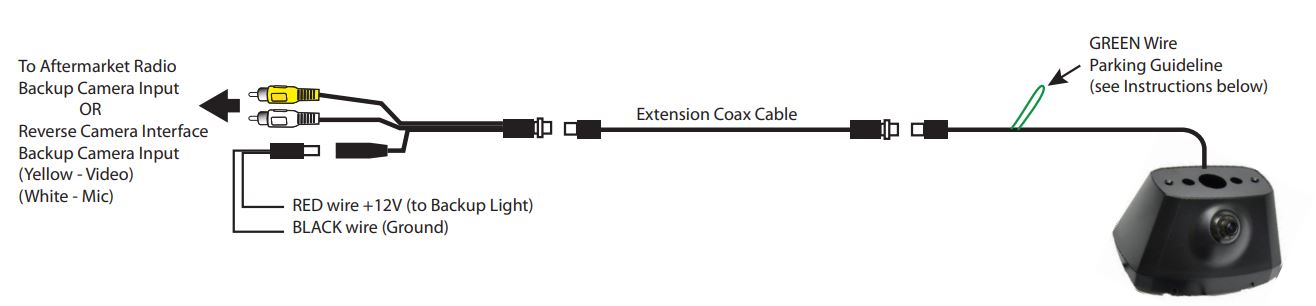
*NOTE: To power the camera, tap power from the radio or RVC Interface or from the reverse light +12V. Connect the Black wire to a solid chassis ground. For vehicles with manual transmission, we recommend tapping +12V power from
the reverse light.
PARKING LINES: Cut the Green loop wire turn OFF parking guide lines.
INSTALLATION PROCEDURE:
- Remove the center rear marker from the vehicle and unplug the lamp connector.
- Insert the 4-pin barrel connector on the camera cable through the OE wire hole.
- Mount the camera base to the vehicle using the nuts and bolts provided in the kit.
- Route the rear marker light connector through the camera base and shroud.
- Mount the camera shroud to the base using the screws provided.
- Plug the rear marker light connector and install the rear marker on the camera shroud using the screws provided.
- Plug the camera’s 4-pin aviation style connector to the extension cable.
- The camera has an optional parking guide lines feature. To turn OFF the parking guide lines, cut the GREEN loop wire.
- Route the camera extension cable from the rear of the vehicle to the monitor location. Use zip ties or tape to secure it.
- Plug the Yellow male RCA to the monitor’s camera input and the White RCA to mic input (if applicable).
- Connect the camera’s power and ground (red and black wire) to the reverse light power wire or to a switched +12V power if you prefer to use the camera even when the vehicle is not in reverse gear. A toggle switch is recommended to turn off the camera when not needed.
- Test the camera before putting back the radio or any trim plates removed.
- Adjust the camera angle if necessary.
