Mercedes Benz:
2004 – 2010 A-Class (W169)
2004 – 2010 B-Class (W245)
2000 – 2006 C-Class (W203)
2007 – 2012 C-Class (W204)
2001 – 2002 E-Class (W211)
2009 – 2012 E-Class (W212)
2005 – 2011 M-Class (W164)
2006 – 2011 R-Class (W251)
2004 – 2008 SLK (R171)
BLUETOOTH CONNECTIVITY FOR SELECT MERCEDES BENZ VEHICLES 2000-2012
We recommend reading this installation guide first before starting any work. Following these instructions from “Start” to” Finish” will ensure a smooth and hassle free installation. We offer telephone support M-F 9:00 AM – 5:00PM PDT at 1 (855) 822-1348. We are here to help.
PARTS INCLUDED:
(1) MB-44B Bluetooth Module
(1) MB-44B CAN Interface Module
(1) MB-44B T-Harness
(1) Instruction Sheet
(1) Microphone
(1) Set of Phone Stickers
PRECAUTIONS:
– Remove the negative side of the battery to avoid any short circuits during the installation.
– Do not install the interface near any major components or near the HVAC system. This may cause damage or overheating to the vehicle.
PRELIMINARY:
Please read the entire manual before installing this interface.
THIS INTERFACE STREAMS THE HANDS-FREE & MUSIC (A2DP) THROUGH THE TWO FRONT SPEAKERS ONLY.
INSTALLING THE INTERFACE
- Remove the factory radio from the dashboard.
- Remove the factory connectors from behind the factory radio.
- Mate the interface connections to the factory connectors. Make sure the All connectors are properly seated into the interface.
- Route the microphone to your desired location. Recommended are is above the rear-view mirror.
- Test the interface first, then re-install the radio into the dash.
INSTALLATION OVERVIEW
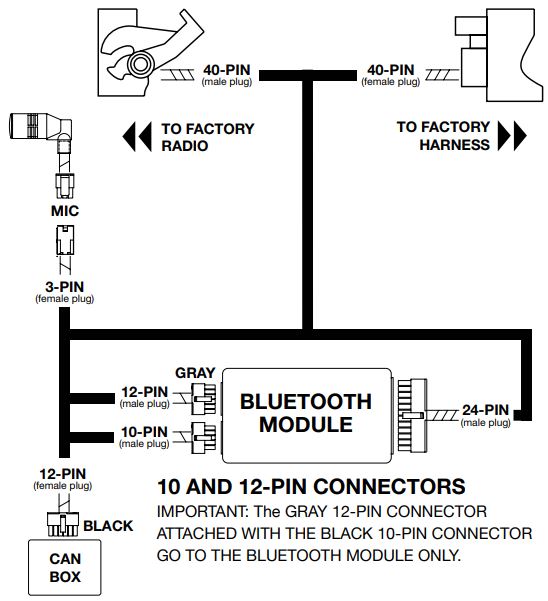
MOUNTING THE MICROPHONE
- Insert the mounting clip into the ball joint on the microphone.
- Mount the clip on your visor or near the rear view mirror.
- Route the remaining cable along the edge of the roof liner and towards the back of the radio, hiding the cable from sight.
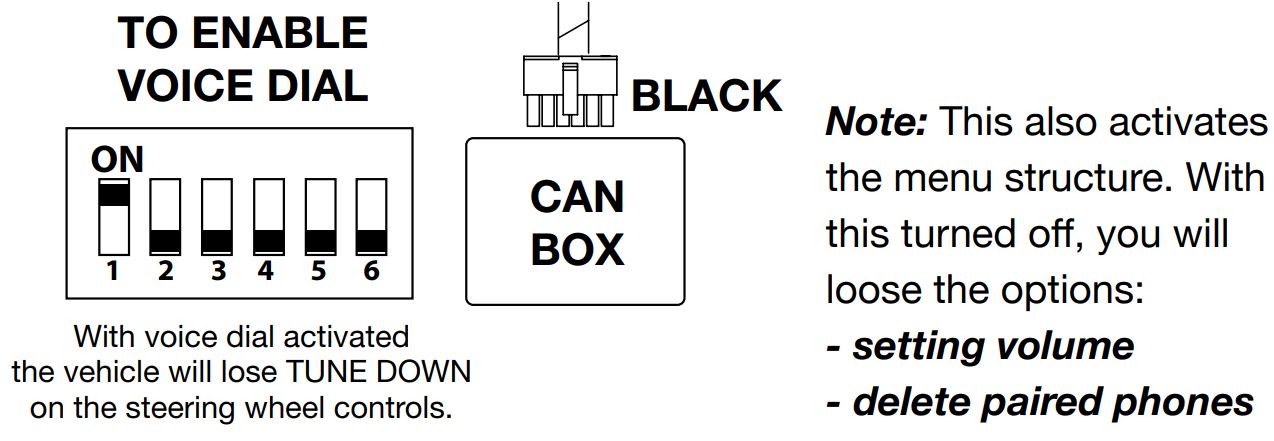
ENABLE VOICE DIAL AND MENU STRUCTURE
Important: Enabling the voice dial feature will disable the TUNE DOWN function on the steering wheel control.
- Place dip switch 1 to the ON position. (As shown below)
HOW TO ENTER THE MENU STRUCTURE
Preliminary: Disconnect from the Beeline device or turn Bluetooth off.
1. Hold Seek Down For 2 seconds on the SWC.
Note: To toggle between choices press seek down.
You are now at the top of the menu structure.
Here are your options:
a. Setting Volume – this controls the Beeline voice prompts. To adjust this menu option use the volume +/ – buttons. Press Seek Down to set the desired volume setting. There are a total of 15 levels from the highest to lowest.
b. Delete Paired Phones – this deletes all phones on the Beeline memory. You will be asked to confirm this option, if so simply press the Seek Up button once. To cancel press Seek Down.
Note: The System Menu will time-out after 6 seconds of no activity. If so, please begin at step one from above.
Note: In order for the menu structure to active, the DIP switch must
be switched to the ON position on the “CAN BOX”.
INITIAL PAIRING
- Turn on the vehicle and wait for the “Ready” then “Searching Phones”.
- From your mobile phone, choose and connect to the “Beeline” device using the password “0000”.
- The interface will announce “Pairing Successful” then “Phone Connected” after the pairing process is complete.
Note: The Bluetooth interface will remember up to the last 8 devices.
Note: If pairing is unsuccessful after several attempts power off thenpower back on to re-attempt, if unsuccessful please contact our tech support line.
AUTO RE-CONNECT
The BEELINE module will automatically re-connect the a previously paired mobile phone when the ignition is turned “ON” to the vehicle and the mobile phone’s Bluetooth feature is also on.
Note: The Bluetooth module will re-connect with the last mobile phone’s it was paired with. If no mobile phone is not found after 15 seconds, it will revert to the initial pairing process.
HANDS-FREE & A2DP FUNCTIONALITY
The Phone button on the steering wheel acts as a multi-function button. (See below)
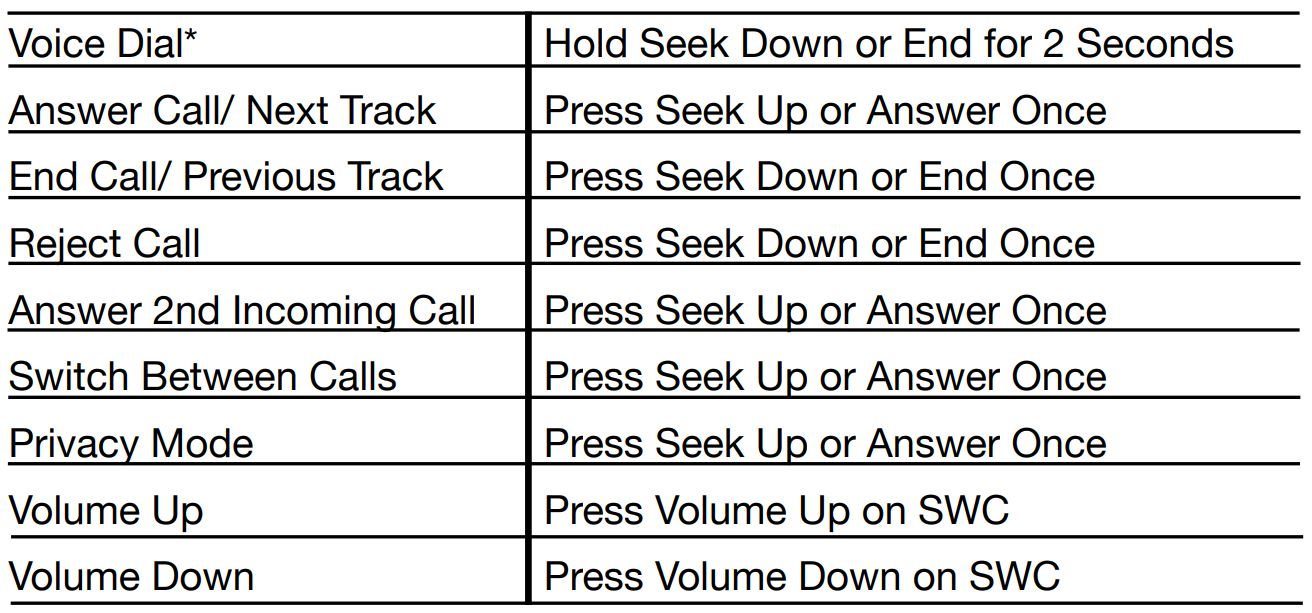
*Mobile phone must support Voice Dial for the function to work
**Use the “Phone Stickers” to help you identify the Answer and End buttons on your steering wheel. Once familiarized, remove the stickers.
TROUBLE SHOOTING TIP
The Phone buttons are retained in most vehicles. In the case where the SWC Phone buttons are not active, please contact MB dealer to update.
STEERING WHEEL CONTROLS
All functionality is done on the steering wheel controls.
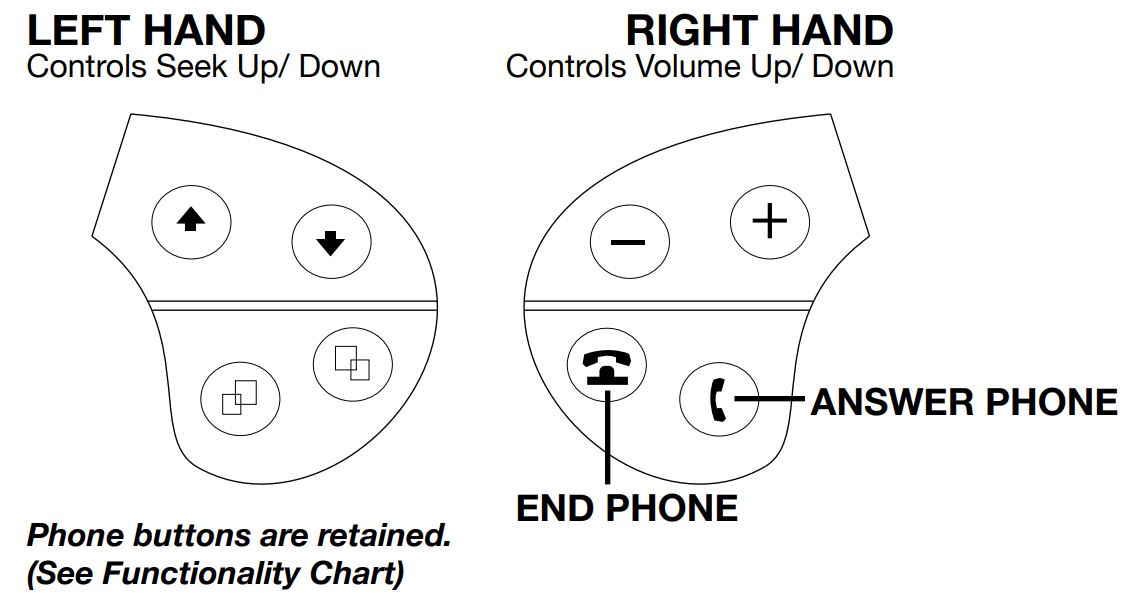
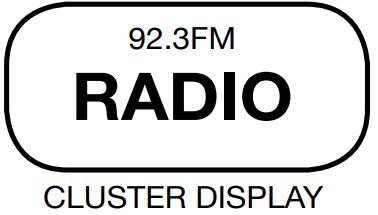
In order for the left side steering wheel controls to work the cluster display must be set to “RADIO”.
For vehicles with the factory Phone buttons, this interface retains their OE functionality. See Functionality Chart.
RADIO CONTROL
There is no Bluetooth control on the factory radio.
All controls are done from the steering wheel controls.
Note: No Menu or Caller ID shown on the radio display.
NOTES
Note: If an incoming call is answered from the mobile phone’s keypad, the call will direct itself to the headset on the mobile phone. To re-direct the phone call to the “BEELINE”, it must be done directly from the mobile phone.
Note: When transferring a phone call to the mobile phone for privacy, the user must re-connect the BEELINE and the mobile phone by selecting the module from the device menu on the phone.
iPhone Note: The Bluetooth interface will disconnect from the mobile phone as soon as the key hits the off position. Then the call will be transferred to the mobile phone and the module will power off after 15 seconds.

