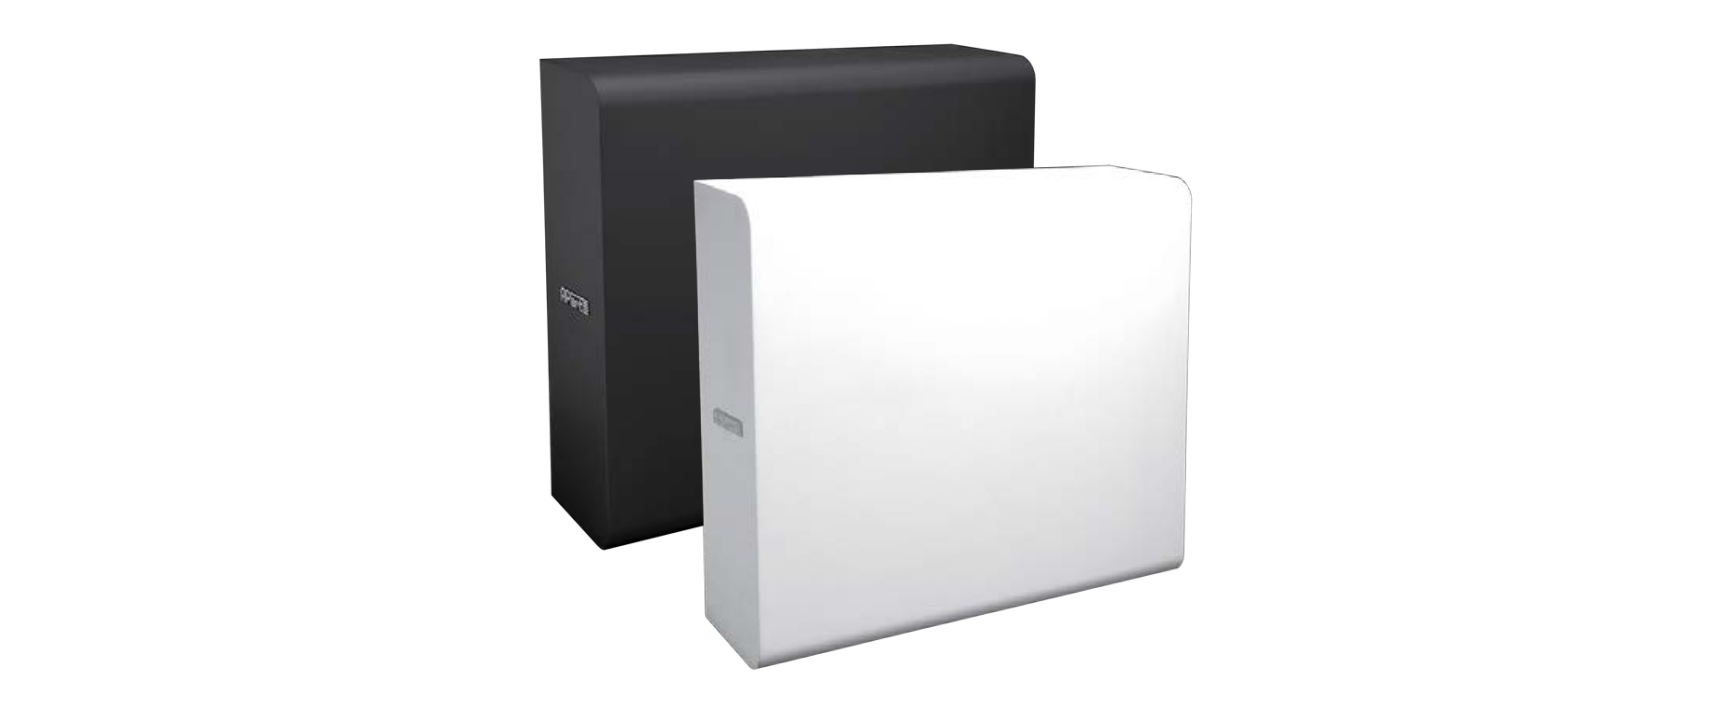
APart SUBLIME-W Wall acoustics
User Manual
Features
The APart SUBLIME subwoofer is designed to reproduce a fat and deep bass despite its slim dimensions.
This subwoofer is the ideal partner for the APart MASK2 satellite speakers. A custom made filter and protection circuitry is incorporated inside the SUBLIME speaker, allowing optimal blending with the MASK2 satellite speakers.
Optionally, you can use the SUBLIME speaker in an active speaker setup, using an active filter and separate power amplifier. You can use the SUBLIME up to 200 Hz.
The cabinet is only 12 cm deep, and the speaker and connection terminals are invisible when mounted on the wall using the included wall mounting brackets.
It may look like a small heating radiator when mounted to the wall, but instead of heat, it will radiate musical vibes in your room.
Due to its discrete design and small dimensions, the subwoofer is very easy to integrate even in the most demanding environments. You can use it lying flat on the floor, hide it under a bench, behind the curtains, or even mount it on the wall using the included wall mounting brackets.
In order to get the most satisfying sound, it is essential that you read this section carefully prior to connecting the subwoofer to your system.
It is generally believed that low frequencies are nondirectional and therefore, placement of a subwoofer within the listening room is not critical … however :
Please note that the performance of the subwoofer is directly related to its placement in the listening room.
Placement close to a room corner will increase the amount of bass output while placing the subwoofer along the middle of a wall, or out in the middle of a room will decrease the amount of bass output.
Experiment with a number of different placement options to find the one that best suits your particular room and musical taste.
Other locations will provide varying degrees of low bass impact and blending with your front speakers. We recommend listening to your system, with the subwoofer in different room positions, to obtain a location with an optimum response.
If you hear too little bass : try moving the subwoofer further toward the room corner or try reversing the polarity of the satellites (phase reverse).
IMPORTANT NOTES: this speaker will perform flawlessly only when you follow our
amplifier and system recommendations.
Do not apply clipped or overloaded signals. Do not apply high power bass lower than 50 Hz.
Unpacking
This speaker has been carefully packed at the factory. Open the carton box and remove the speaker from the packing. Do not use sharp objects to remove the protective bag from the speaker.
Place the speaker on a flat surface. The mounting brackets are included in the packing.
When the product shows signs of damage caused by transportation, contact your dealer immediately.
Damage due to transport and rough handling is not covered by the manufacturers warranty.
Wall mounting
We recommend to use the subwoofer mounted to the wall. Special mounting brackets are included.
First, position the subwoofer on a table with the connection terminals facing up (towards you).
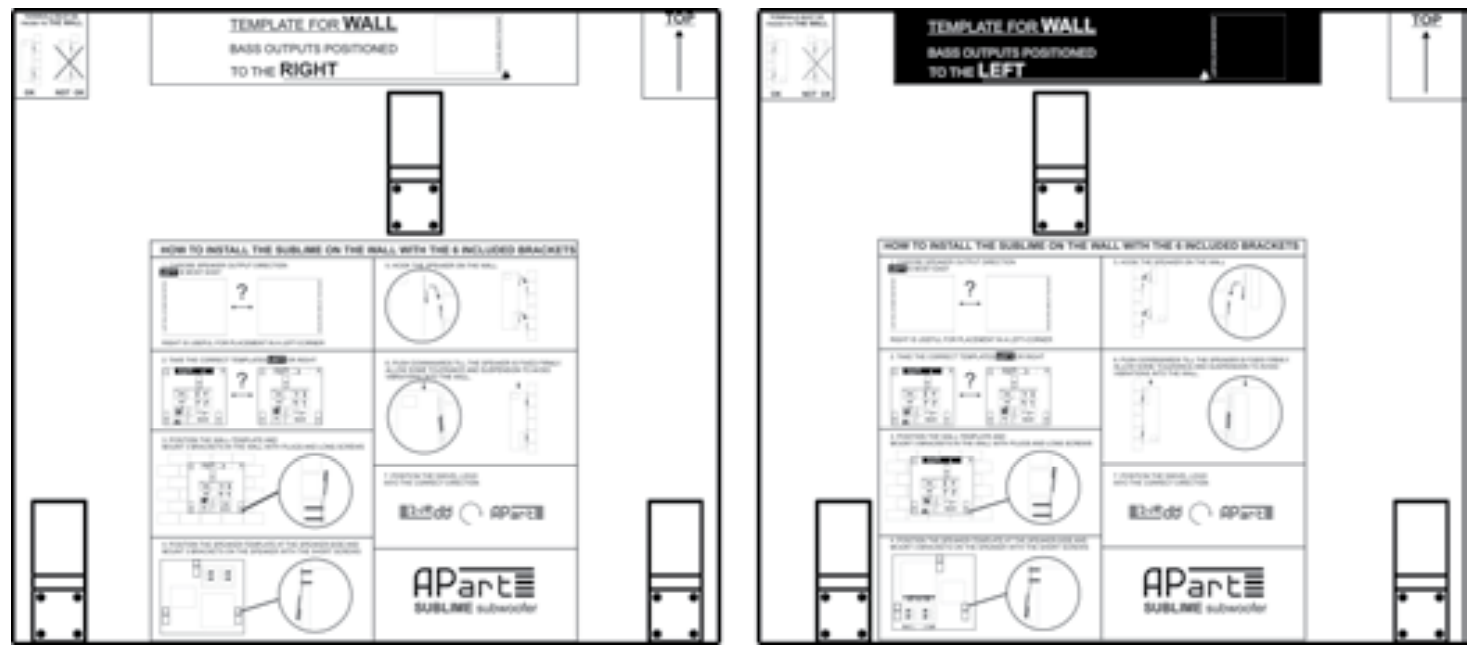
Protect the surface by using the packing material. A speaker template with the location of the drill holes is included with the subwoofer. Position the SPEAKER template on the subwoofer’s backplate and drill the mounting holes with a 2 mm drill. Fix the brackets on the backplate.
Next, position the WALL template on the wall and mark the drill holes.
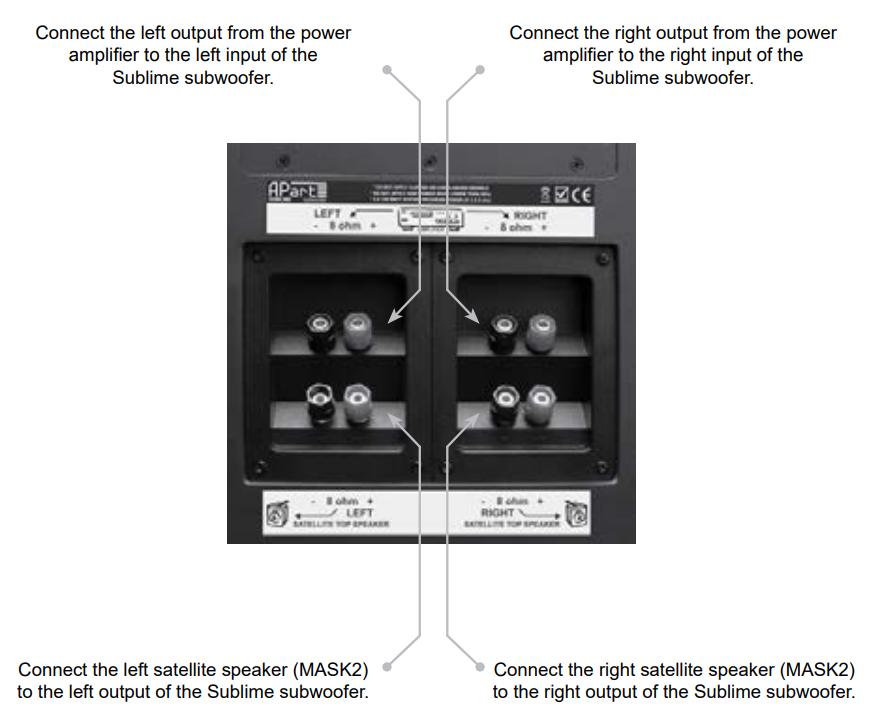
Fix the remaining brackets on the wall. Connect the speaker cable to the terminals.
Carefully slide the subwoofer over the wall brackets and push it firmly in place.
A few millimeters of tolerance allows you a nice fit, and also some extra suspension, resulting in good acoustical insulation from the wall.
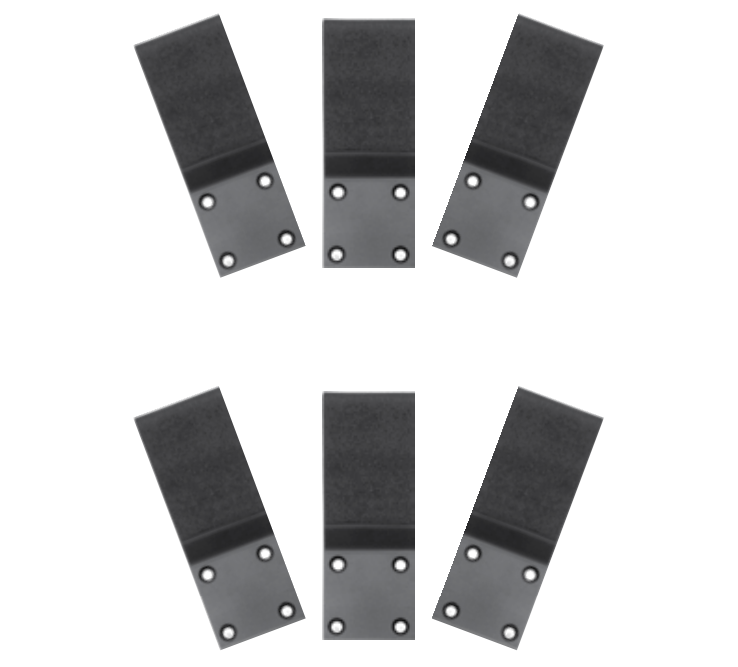
Speaker template
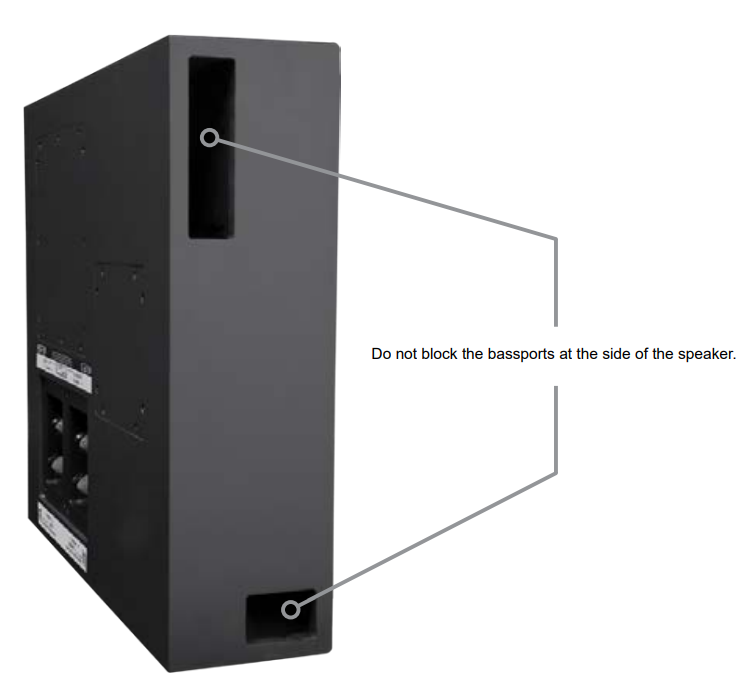
Please note that the subwoofer outputs, these are the two holes on the side, can be placed in left or right position. Use the LEFT or RIGHT templates accordingly.
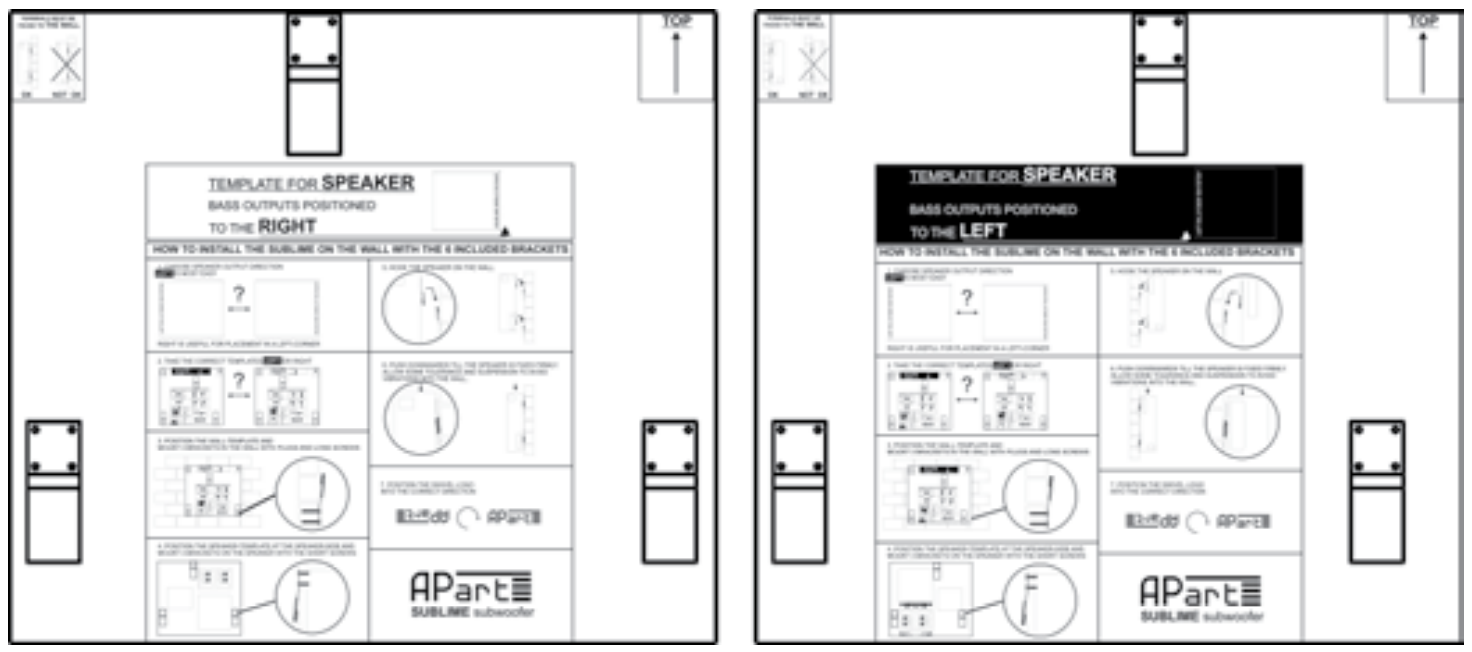
Wall template
Connections
Bass ports
Corner mounting
Do not block the bassports at the side of the speaker.
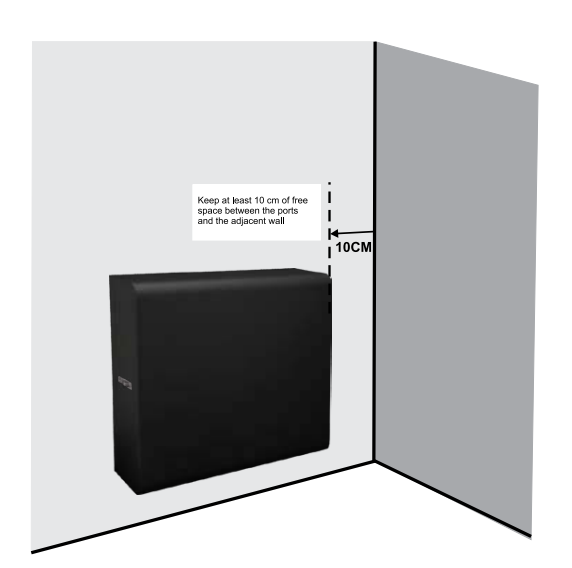
Keep at least 10 cm of free space between the ports and the adjacent wall.
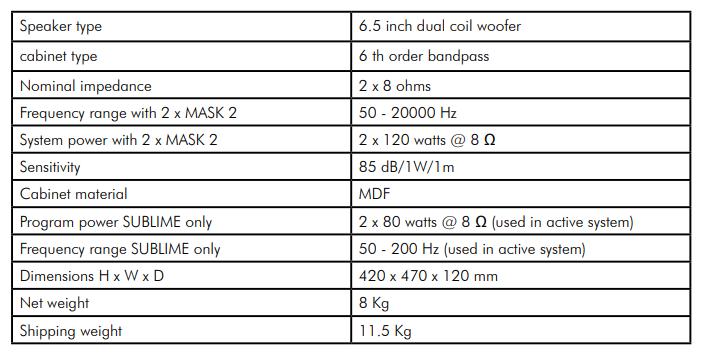
Technical specifications
Company names, product names, and names of formats, etc. are the trademarks or registered trademarks of their respective owners.
© 2009 APart-Audio specifications subject to change without notice.
![]()

